What are banana mochi rolls?
Banana mochi rolls are a sweet and chewy Asian dessert made with sweet glutinous rice flour, rice flour, banana filling, etc. The mochi dough is typically rolled out into thin layers, filled with mashed banana and sugar, and rolled into a log shape. The log is then sliced into rounds, creating individual servings of the sweet treat. Banana mochi rolls are a popular Asian dessert or snack that you must try! Read on!

Jump To
Simple ingredients
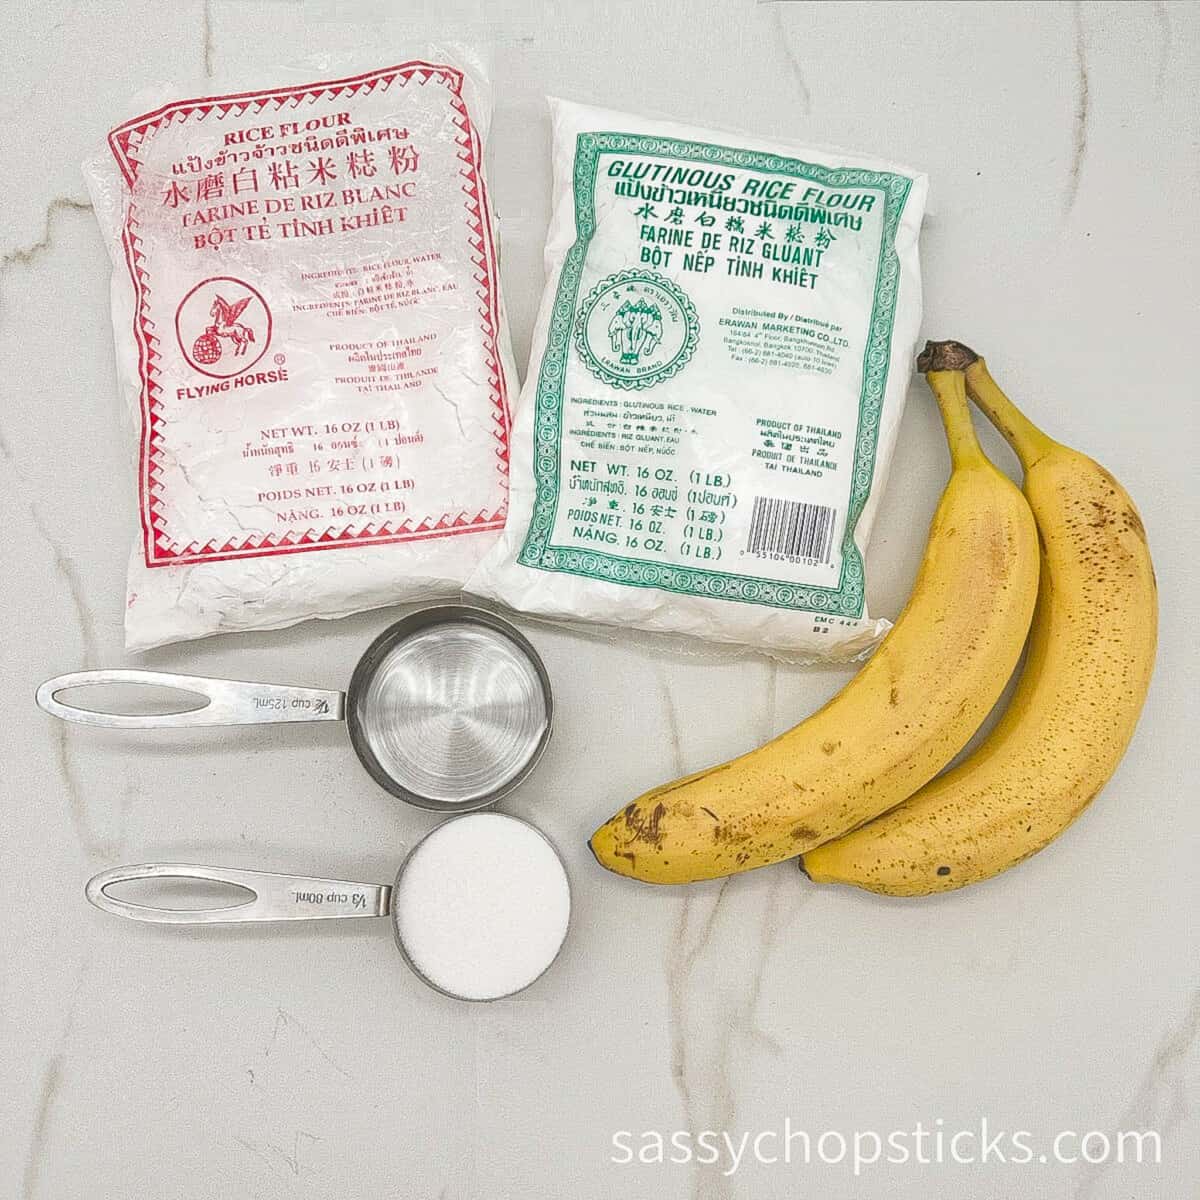
The ingredients for banana mochi rolls typically include:
Dry ingredients
Sweet rice flour (also called Mochiko flour, mochi flour, or glutinous rice flour): It is the key ingredient responsible for this banana roll mochi's chewy and sticky texture. This type of rice flour has a higher starch content than regular rice flour, which creates the characteristic chewiness of mochi. You can get it easily in Asian grocery stores.
Rice flour: The rice flour also helps to bind the ingredients together and hold their shape, allowing you to roll the mochi into a desired form. Additionally, rice flour is gluten-free, which makes banana mochi suitable for individuals with gluten sensitivity. Do not confuse it with regular flour, as they are different.
Powdered sugar: I used ⅓ cup of powdered sugar in this banana mochi. You can also use raw brown sugar. The amount of sugar added can be adjusted according to personal taste preferences.

Wet ingredients
Ripe bananas: Ripe fresh bananas are sweeter than unripe ones; overripe bananas are even better. They have a higher sugar content, which adds natural sweetness and banana flavor to the mochi.
Water: Water acts as a binding agent, helping to bring all the ingredients together into a blended dough. It also helps achieve the desired consistency.
Step-by-step instruction
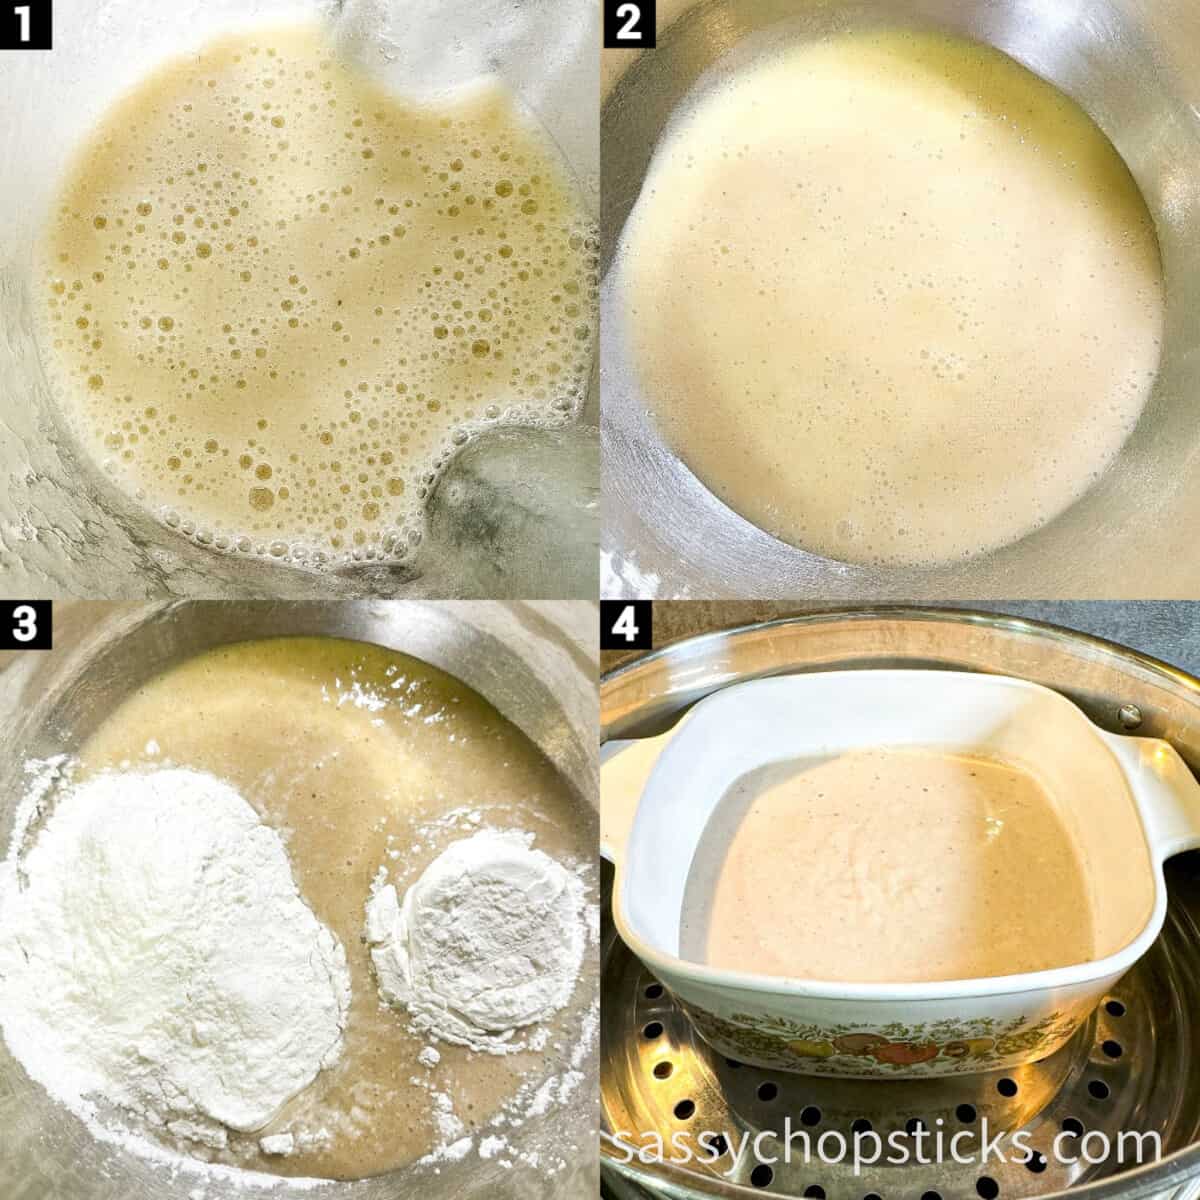
Peel the ripe bananas and break them into small chunks. Add the sugar, water, and banana chunks into the high-speed blender. Blend until well combined.

Slowly add rice flour and sweet rice flour to the banana mixture. Stir gently until the mixture forms a smooth batter about a little thicker than the yogurt consistency. Pour batter into a steam-friendly medium bowl and steam for 30 minutes on medium-high heat. The steamed mixture should be like a smooth paste.

In the meantime, toast a cup of sweet rice flour in a pan until it turns light brown color. We will use it to dust the prep surface to prevent sticking. Once the steaming is done, let the mixture cool down for 10 minutes. Then set the mixture onto the dusted surface and knead it for a few minutes until it becomes smooth and no longer sticks to your hands. Add a little more cooked sweet rice flour if it's too sticky.

Divide the dough into two big equal portions and roll each into a thin, flat rectangle. Roll up each rectangle into a long log shape roll. Cut each log into bite-sized small pieces. Serve and enjoy!
Pro tips for the perfect banana mochi recipe
Here are some key tips to help you make perfect banana mochi roll:
- The sweetness and flavor of the bananas are an important filling component. Make sure to use ripe bananas that are soft and easy to mash.
- Kneading the dough helps to activate the glutinous rice flour and create a smooth, elastic texture. This will ensure that the dough is easy to roll out and shape.
- Mochi dough is very sticky, so dusting it with toasted sweet rice flour will help prevent the dough from sticking and make it easier to handle.
- Roll the dough into thin, flat rectangles to ensure the banana filling is evenly distributed before rolling.
Storage
Storing banana mochi properly will help maintain its freshness and taste. First, allow the banana mochi to cool completely at room temperature after cooking. If you have individual pieces of banana mochi, wrap each piece tightly in plastic wrap or place them in separate airtight containers. This will prevent them from sticking together and keep them fresh. If you have a whole log of banana mochi, store it in an airtight container. Make sure the lid fits tightly to prevent air from getting in and causing the mochi to dry out.

Banana mochi can be stored in the refrigerator to extend its shelf life. The cool temperature will slow down the growth of bacteria and mold. However, refrigeration might make the mochi harder, so it's best to bring it back to room temperature before consuming it. If you don't plan to consume the banana mochi within a few days, freezing is a good option. Wrap individual pieces tightly in plastic wrap and place them in a freezer-safe bag. Frozen banana mochi can last for several months. When you're ready to eat frozen banana mochi, take it out of the freezer and let it defrost at room temperature for a few hours or in the refrigerator overnight.

Conclusion
This delightful banana mochi recipe offers a perfect fusion of flavor and texture, combining the sweetness of ripe bananas with the chewy goodness of mochi. The simplicity of this recipe makes it an ideal treat for any occasion. Let me know what you think by leaving comments below. Enjoy your homemade banana mochi recipe!

Chewy Banana Mochi Recipe (Vegan, Gluten-Free!)
Ingredients
- 2 large ripe bananas
- ⅓ cup powdered sugar
- ½ cup water
- 1 cup sweet rice flour
- ⅓ cup rice flour
Instructions
- Peel the ripe bananas and break them into small chunks.
- Add the sugar, water, and banana chunks into the high-speed blender. Blend until well combined.
- Slowly add rice flour and sweet rice flour to the banana mixture. Stir gently until the mixture forms a smooth batter about a little thicker than the yogurt consistency.
- Pour batter into a steam-friendly medium bowl and steam for 30 minutes on medium-high heat. The steamed mixture should be like a smooth paste.
- In the meantime, toast a cup of sweet rice flour in a pan until it turns light brown color. We will use it to dust the prep surface to prevent sticking.
- Once the steaming is done, let the mixture cool down for 10 minutes. Then set the mixture onto the dusted surface and knead it for a few minutes until it becomes smooth and no longer sticks to your hands. Add a little more cooked sweet rice flour if it's too sticky.
- Divide the dough into two big equal portions and roll each into a thin, flat rectangle.
- Roll up each rectangle into a long log shape roll. Cut each log into bite-sized small pieces.
- Serve and enjoy!


Leave a Reply