
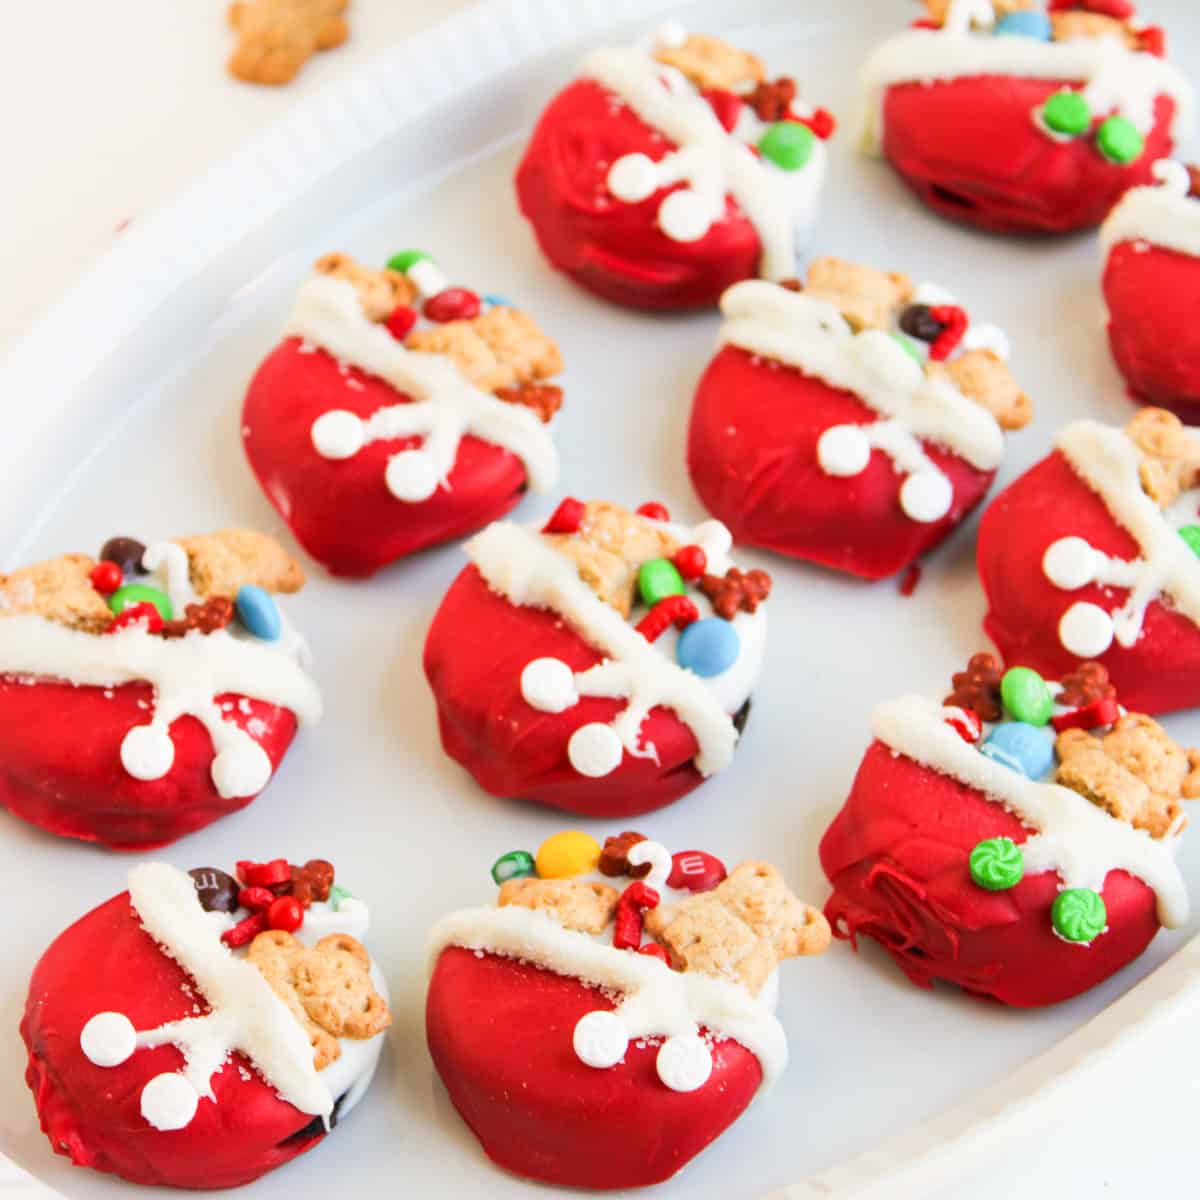
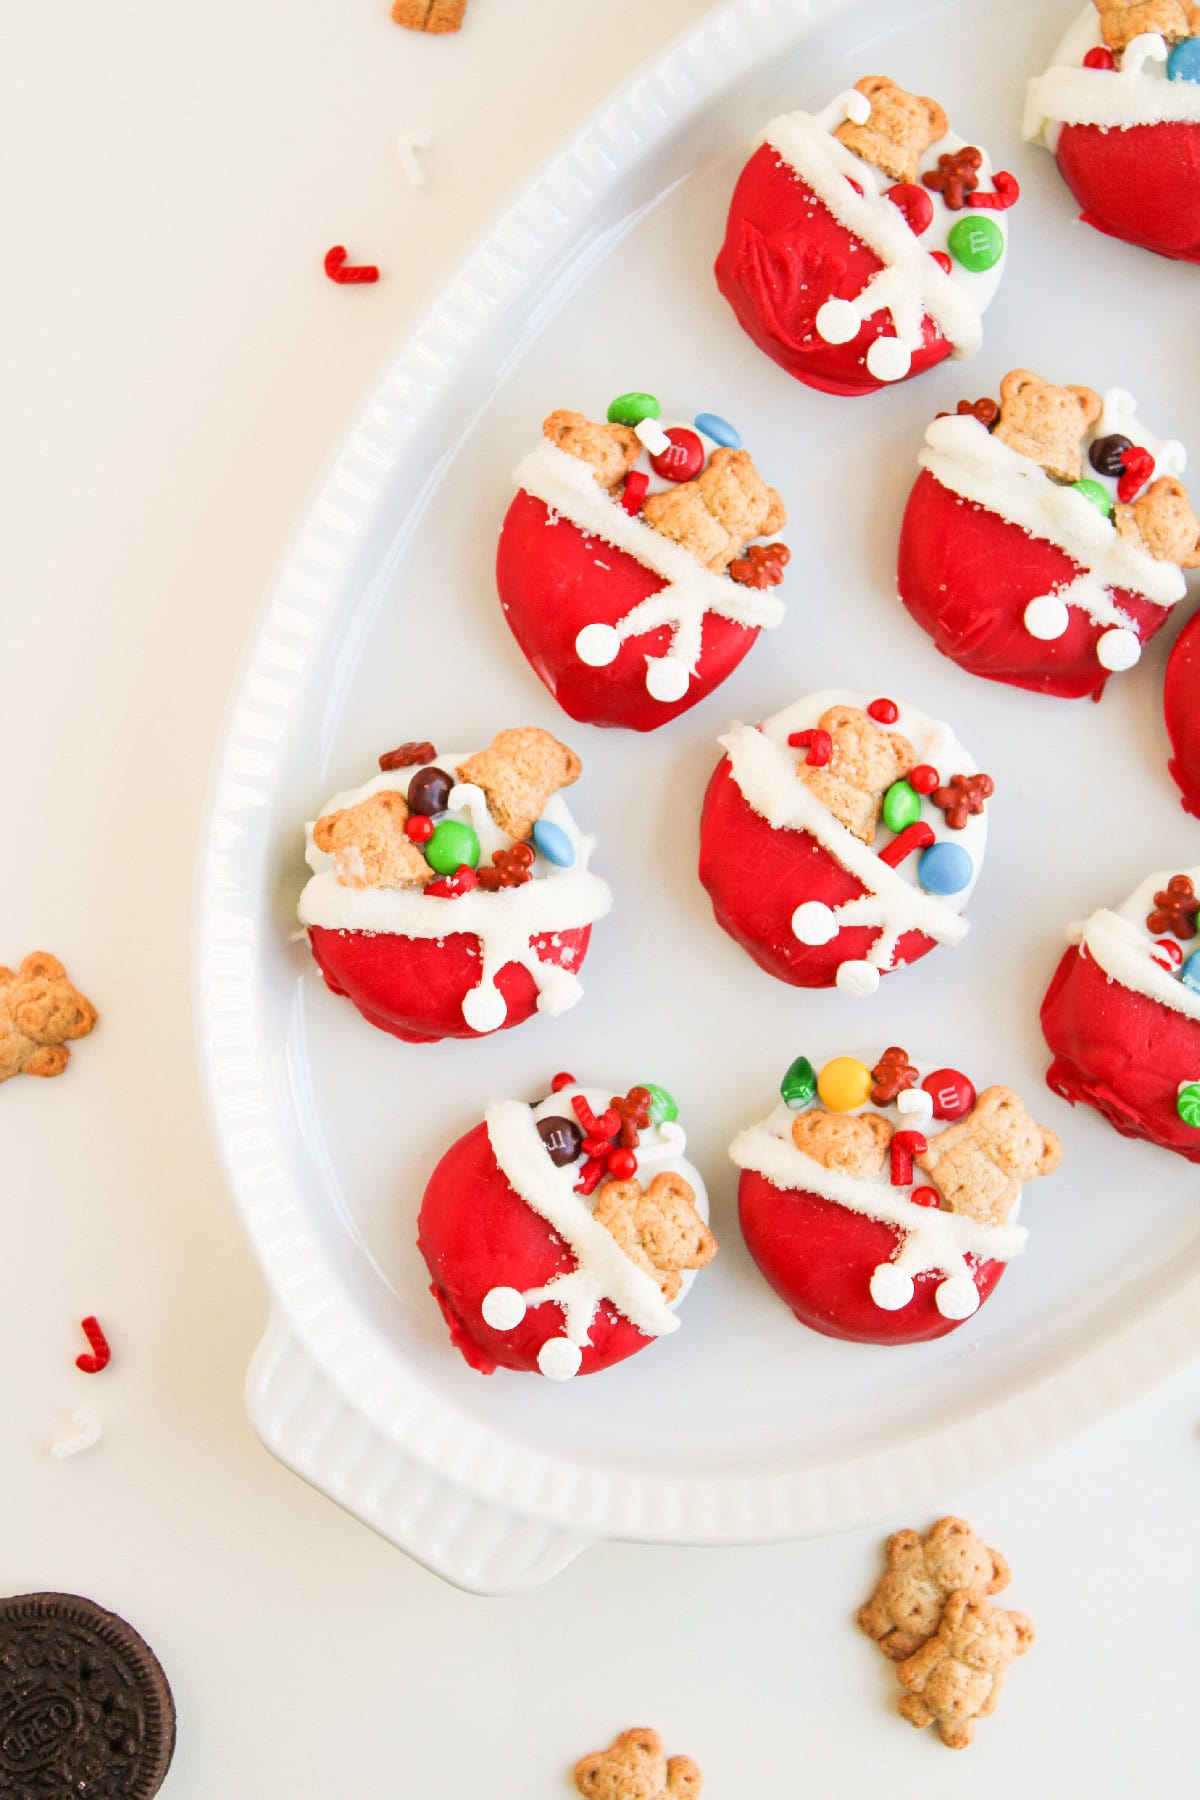
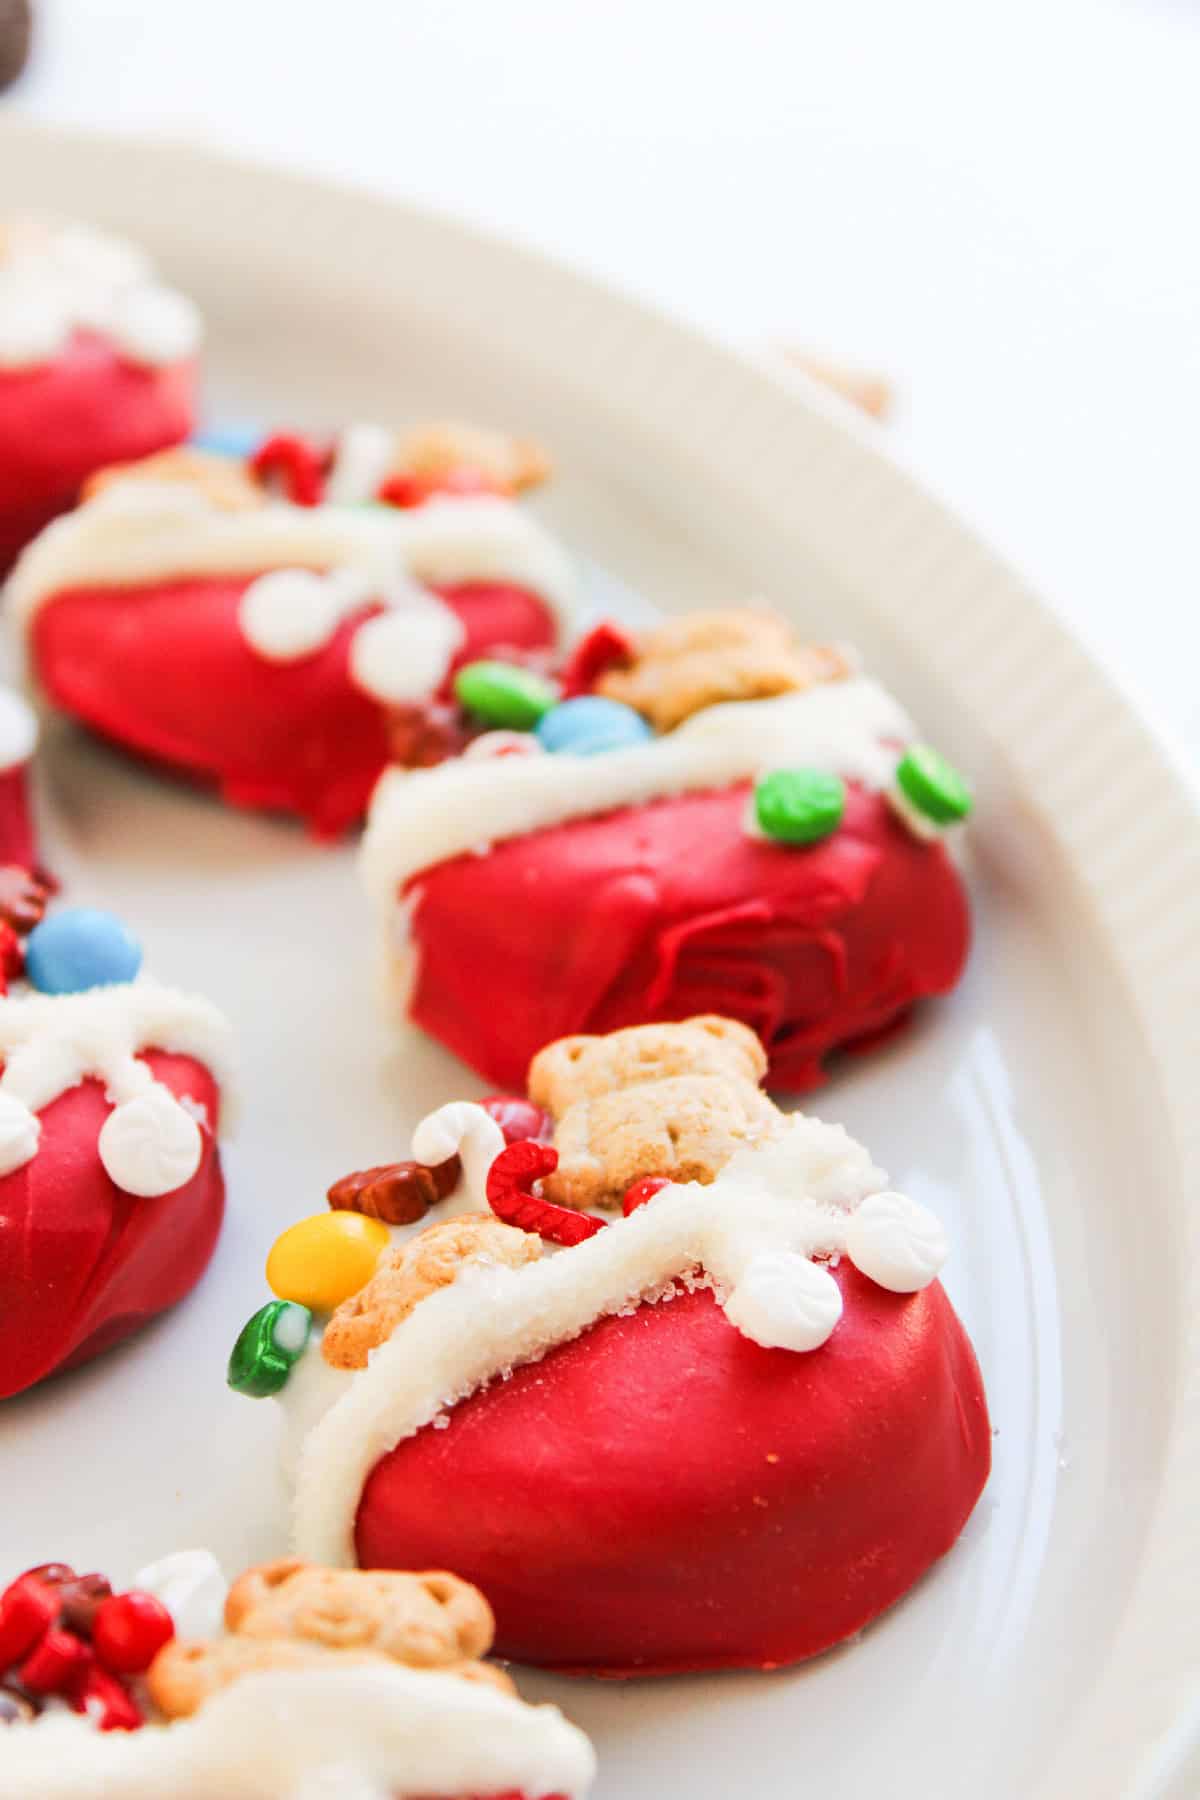
There’s something extra magical about the holidays when sweet treats meet festive creativity, and these Christmas Oreos are proof of that. Imagine a chocolate covered Oreo wrapped up like Santa’s toy bag, fun, delicious, and incredibly easy to make. With a smooth, melted chocolate coating on each cookie and a sprinkle of holiday cheer, these Christmas chocolate Oreos are the perfect no-bake dessert for parties, cookie platters, or thoughtful edible gifts.
Whether you’re looking for Oreos for Christmas, making Christmas Oreos cookies with your family, or creating a festive platter of Santa’s Toy Bag Oreos, they’re a simple way to turn classic Oreos into a merry Christmas treat everyone will love.
Ingredients You’ll Need to Make Festive Christmas Oreos
Making these festive treats is as fun as it is delicious, and the best part is, you only need a handful of simple ingredients to turn ordinary cookies into a magical holiday dessert.
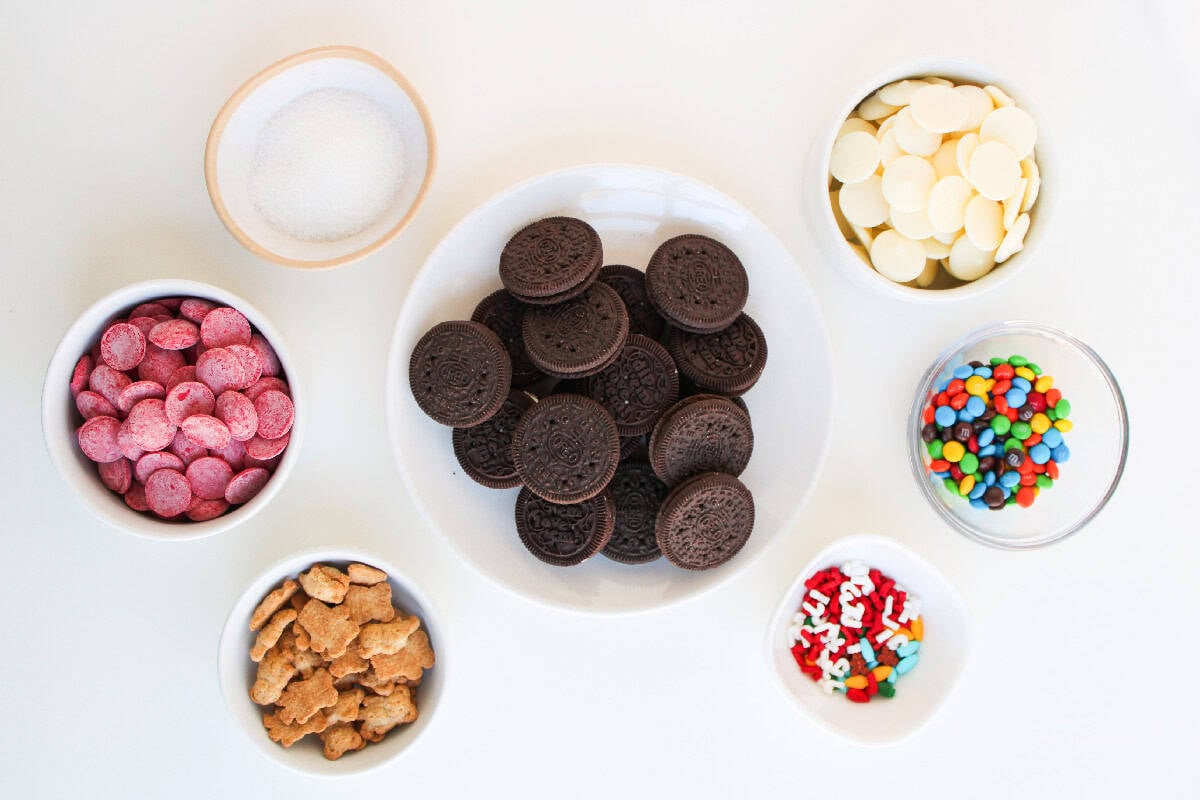
- Oreo cookies: Classic chocolate sandwich cookies are the perfect base for dipping and decorating.
- Red melting chocolate wafers: Melt smoothly and give your Oreos a bright, festive coating.
- White melting chocolate wafers: A pretty contrast to the red coating, creating a wintry look.
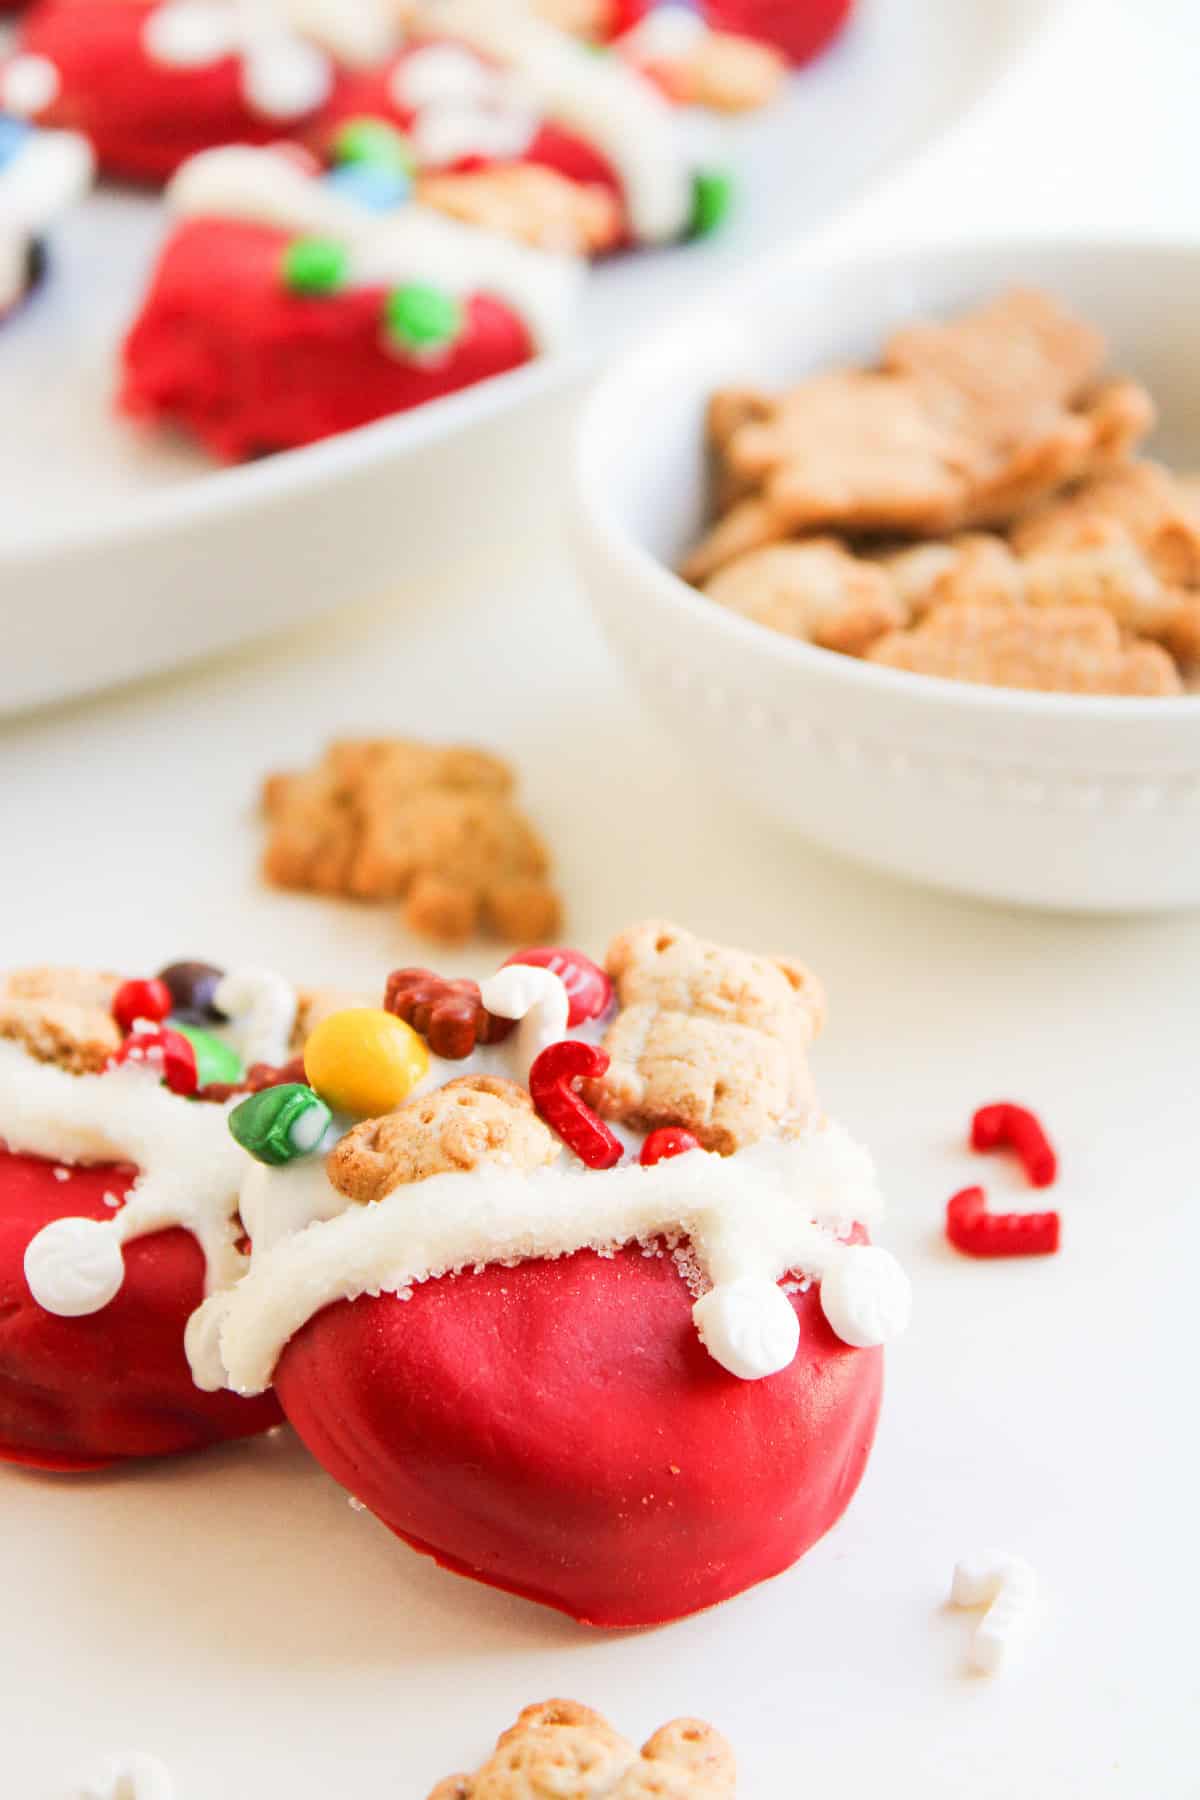
- Teddy Grahams: A cute, crunchy topping that adds a playful touch to each cookie.
- Mini M&M’s: Pops of color that make your Christmas Oreo cookies look like little ornaments.
- Christmas sprinkles: Candy canes, gingerbread men, or any holiday-themed sprinkles add instant charm.
- White sanding sugar: A subtle sparkle that makes your chocolate covered Oreos shine.
Step-by-Step Instructions for Making Christmas Oreos
Turning classic cookies into festive holiday treats is easier than you might think. With just a little melted chocolate and a few fun toppings, you can create Christmas Oreos that look like Santa’s toy bag, cute, colorful, and absolutely delicious.


Prepare your workspace: Line a baking sheet with parchment paper so your cookies have a clean surface to set on.
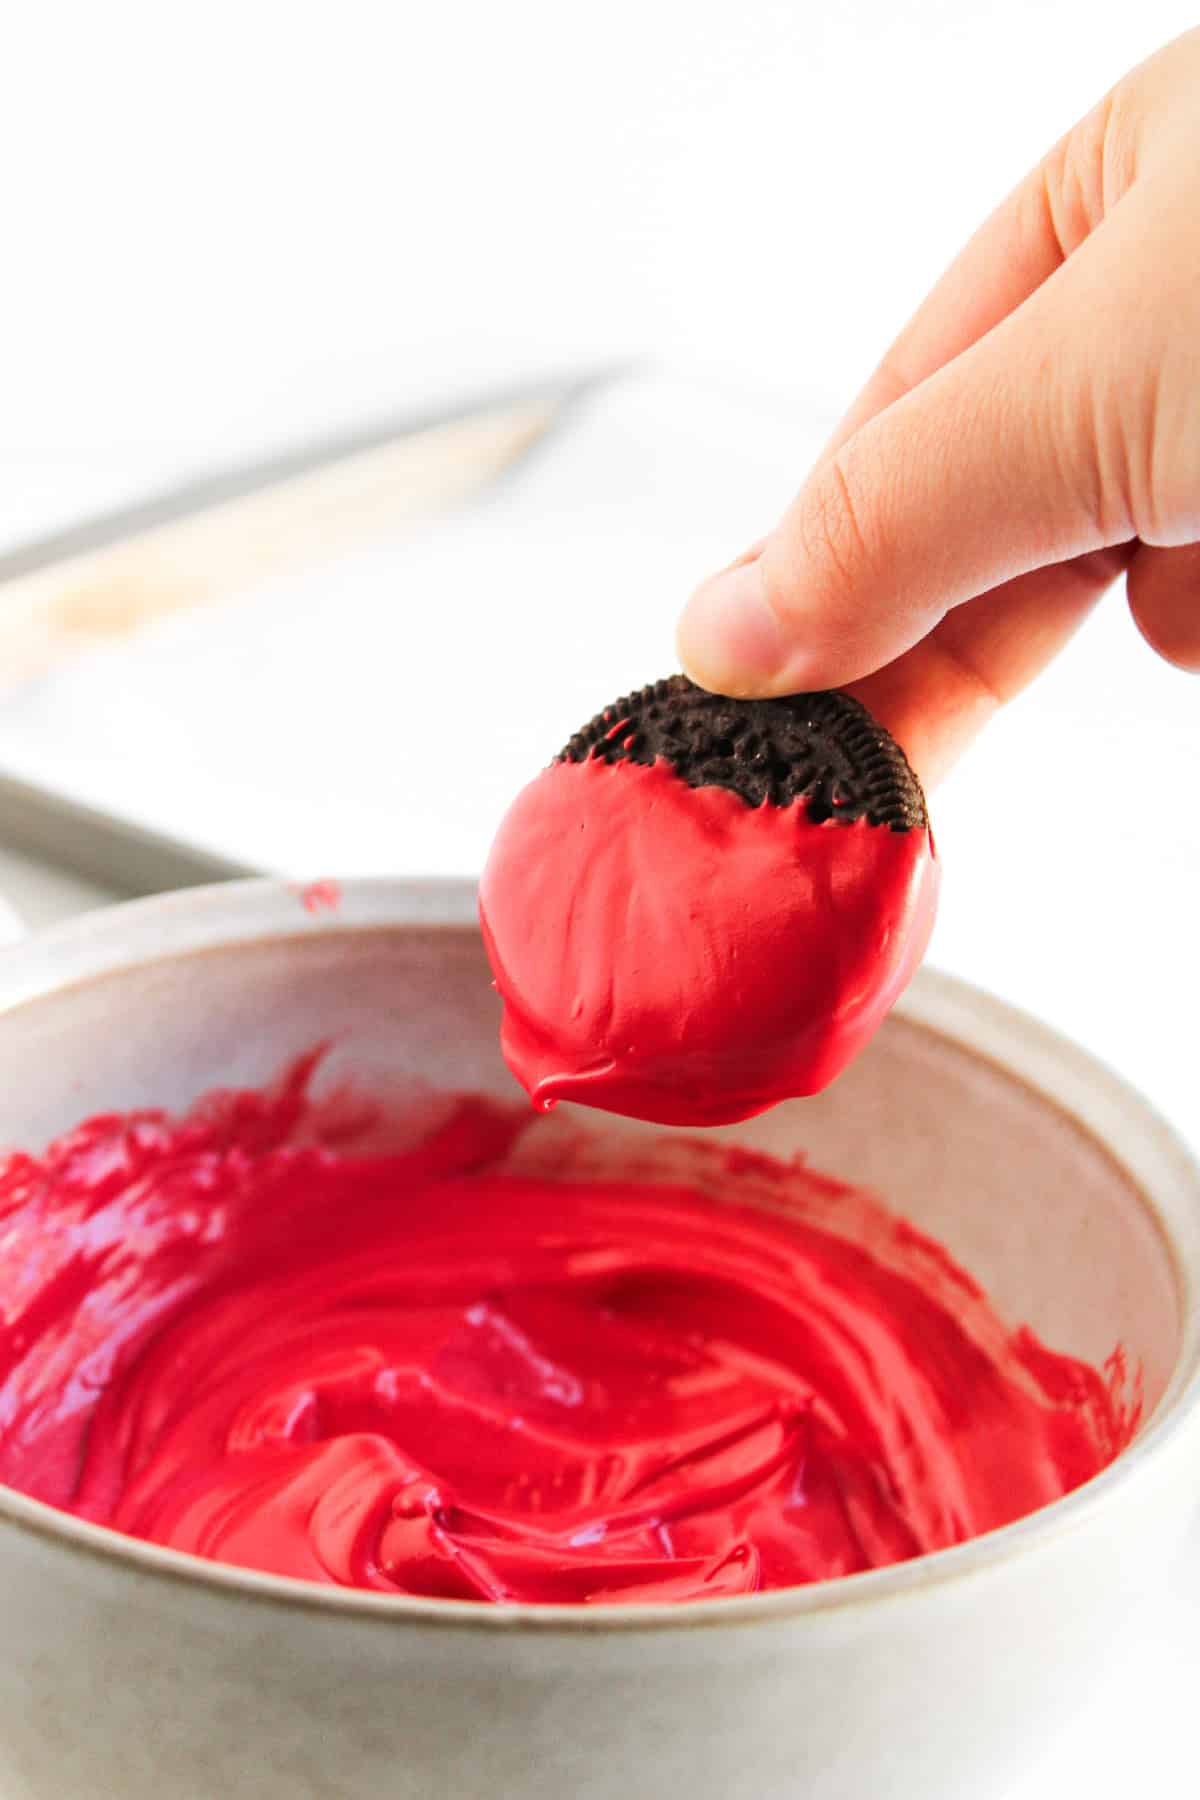
Melt the red chocolate: In a microwave-safe bowl, melt the red melting wafers in 30-second intervals, stirring between each, until smooth and glossy.
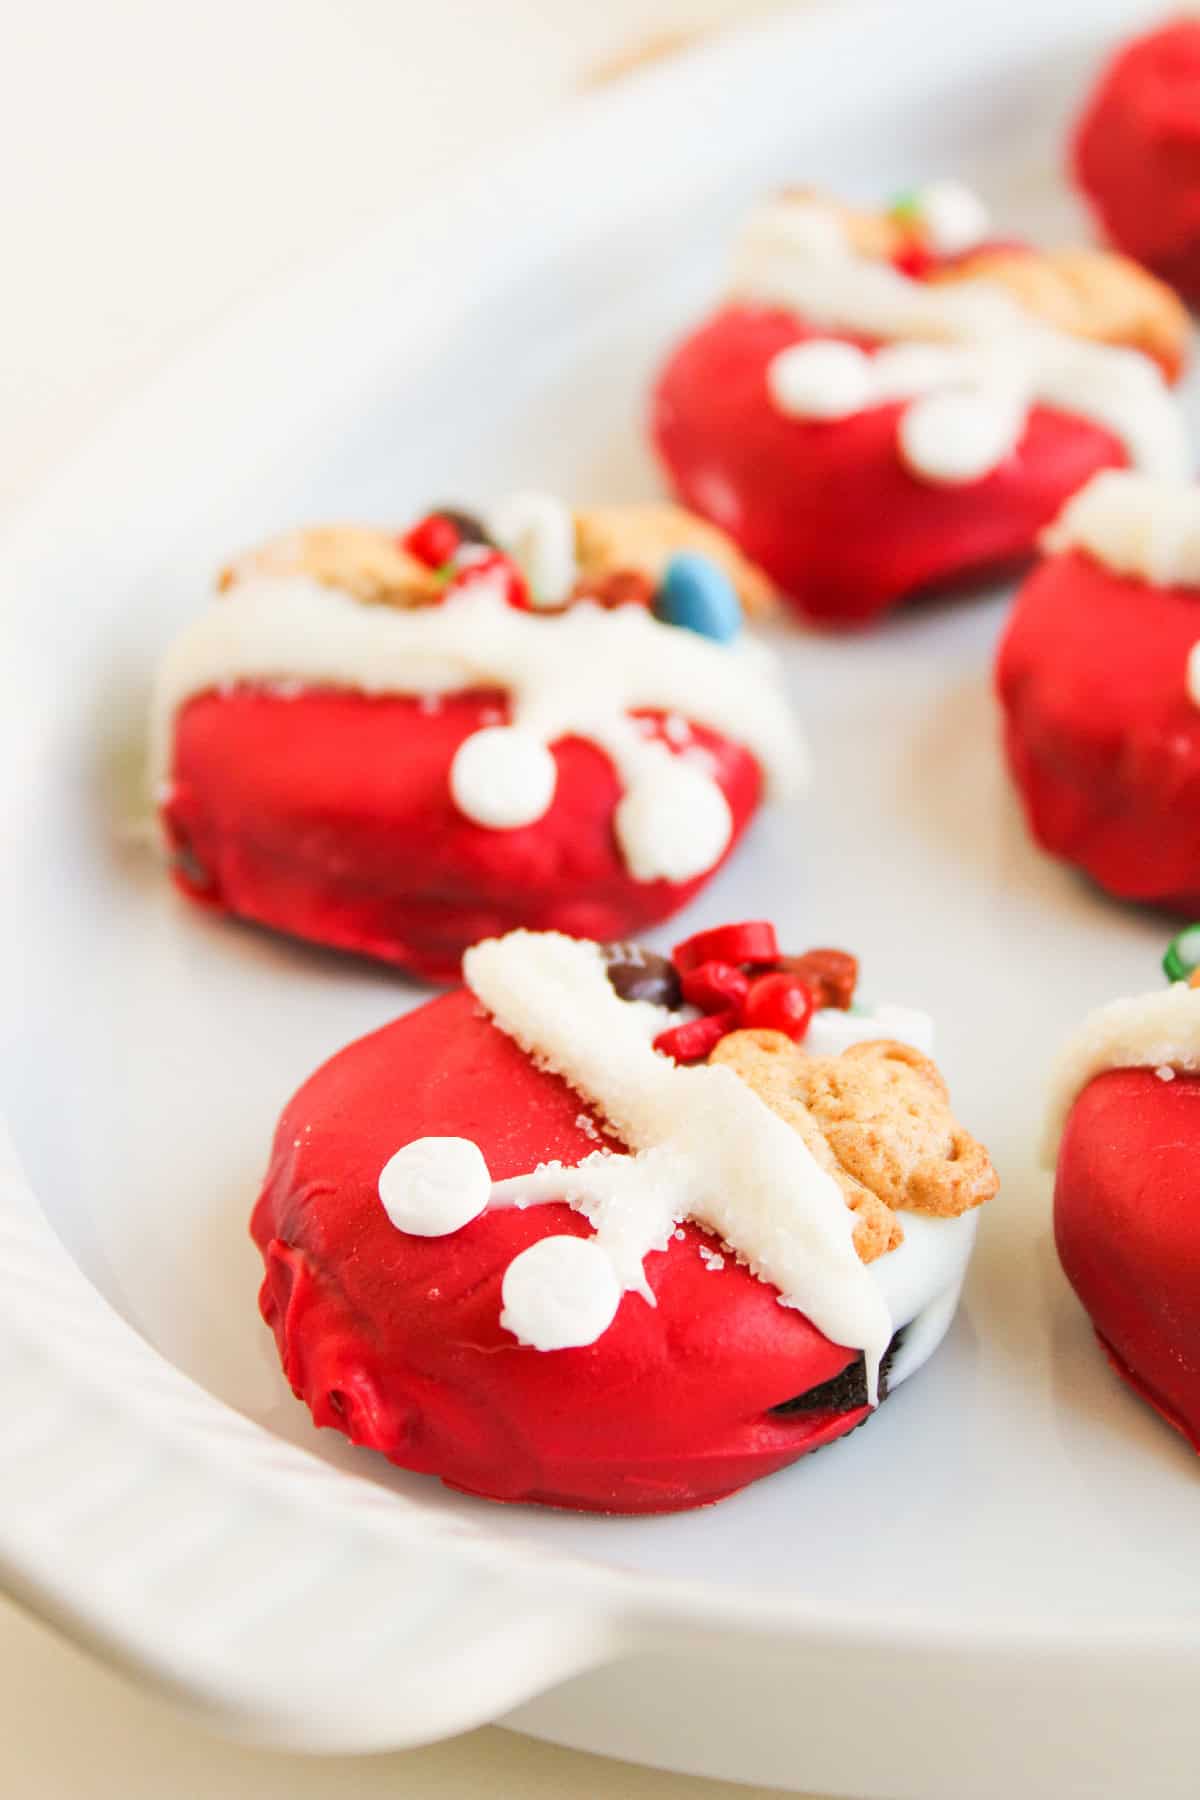
Dip the cookies: Dip each Oreo about three-quarters of the way into the red melted chocolate, then place it on the prepared baking sheet to harden completely.
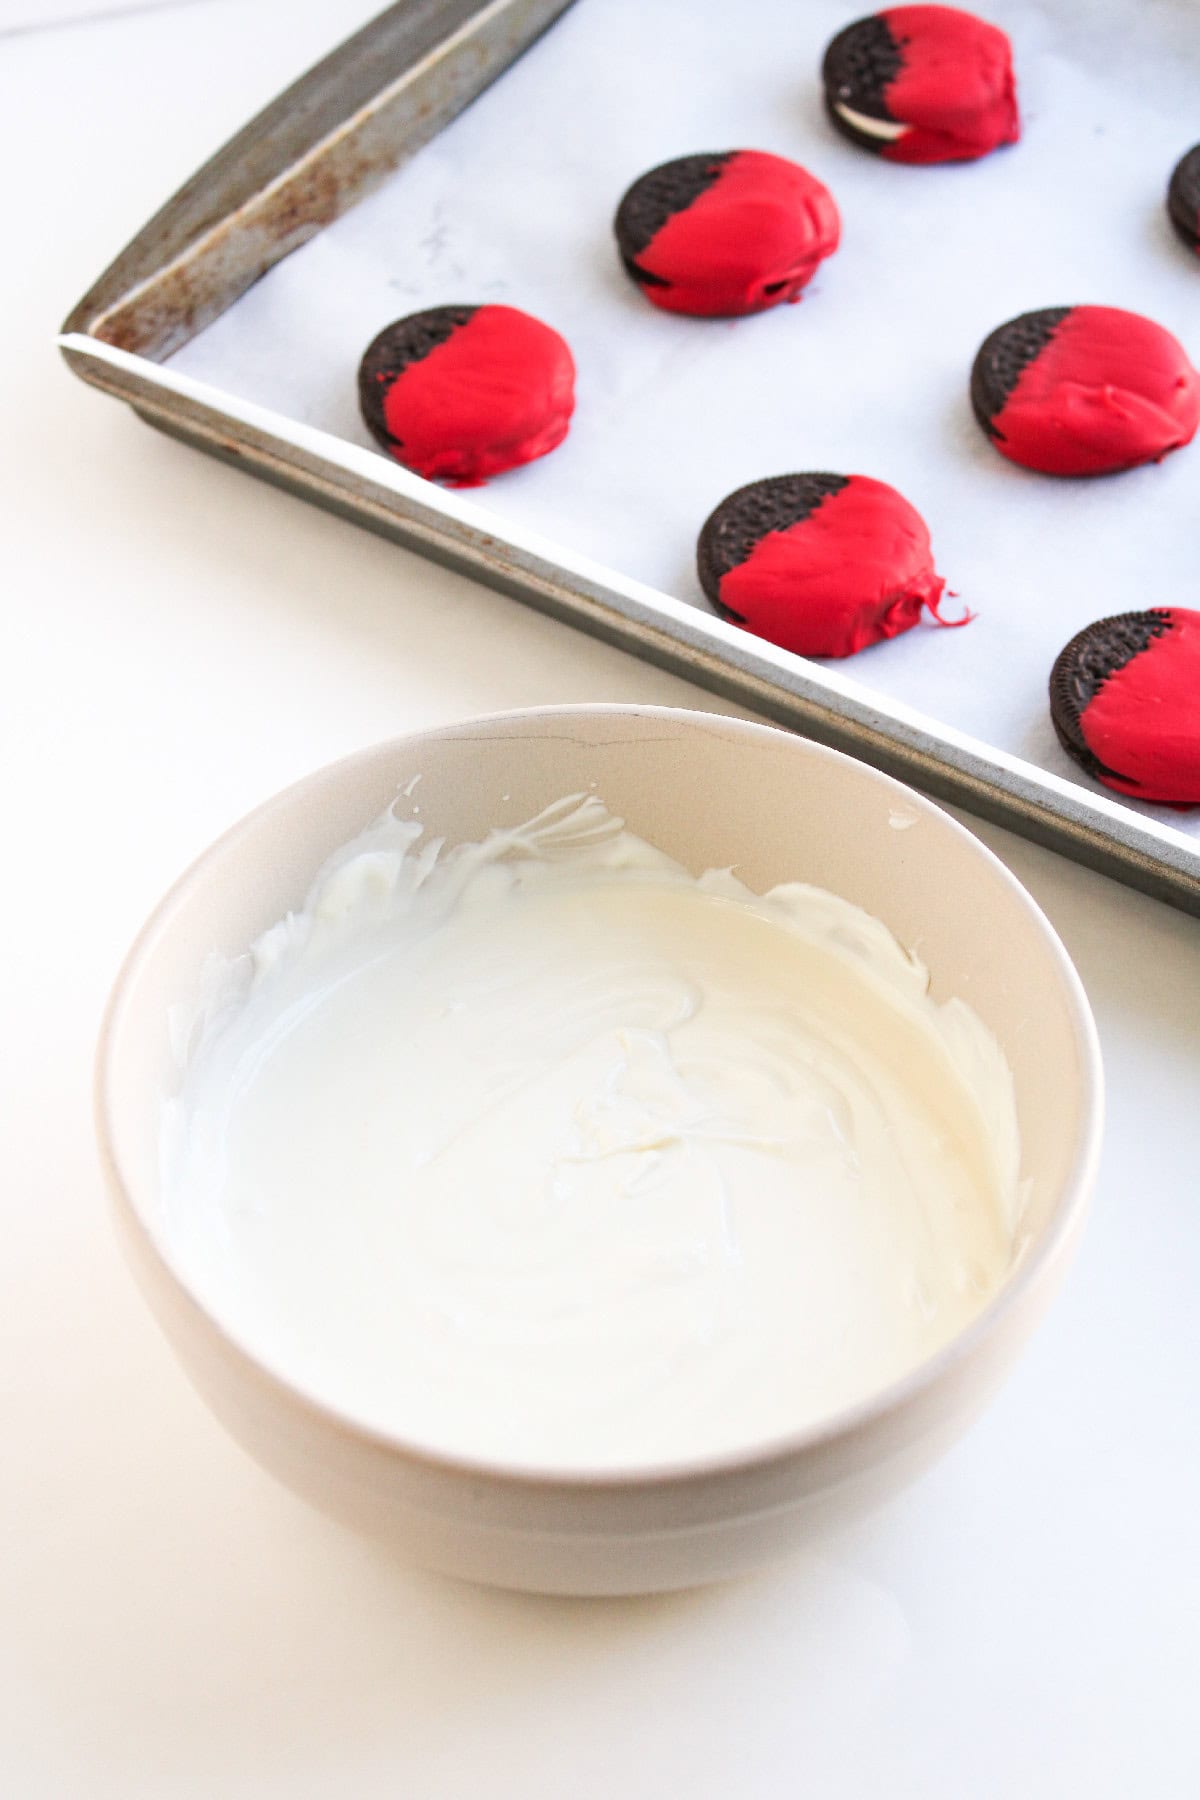
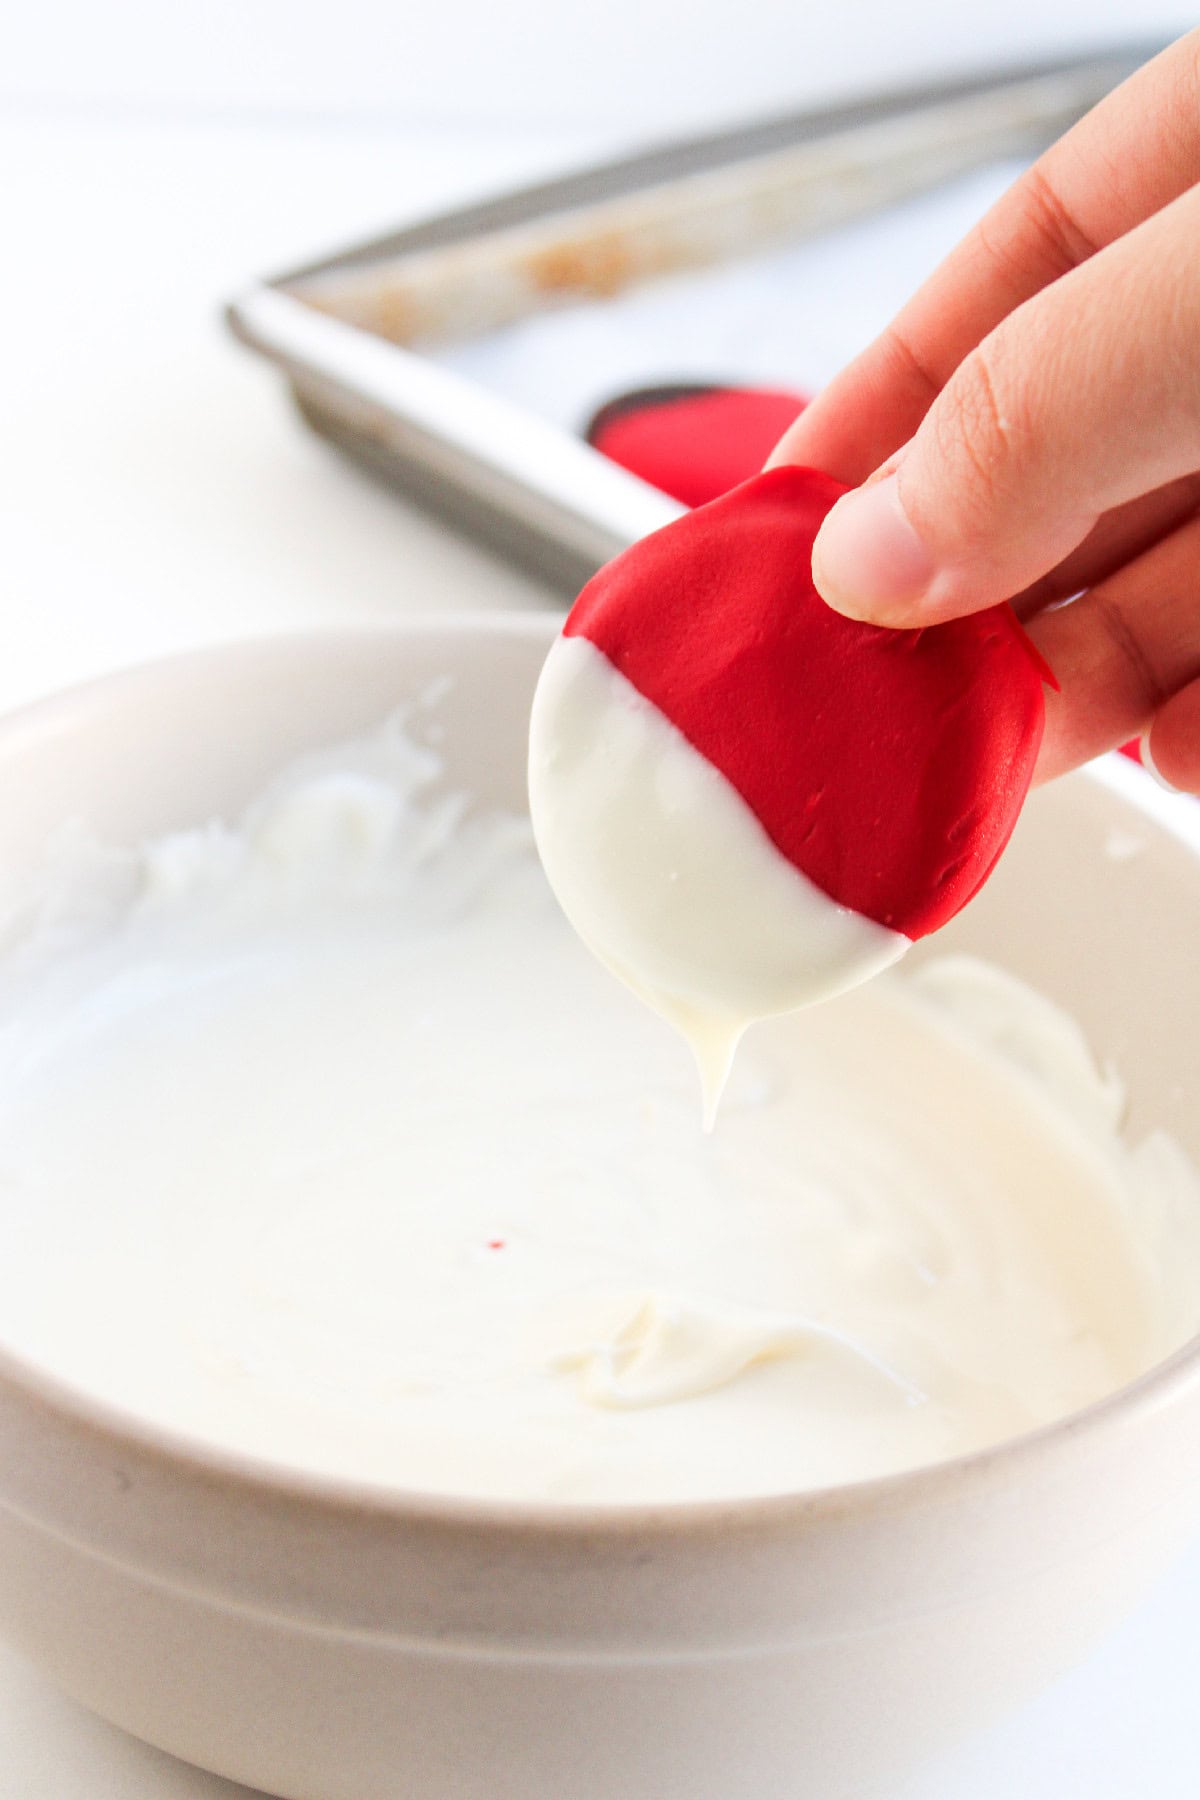
Add the white chocolate layer: Using the same melting method, prepare the white chocolate. Dip the opposite side of each cookie into the white chocolate, letting it meet the red for a clean line.
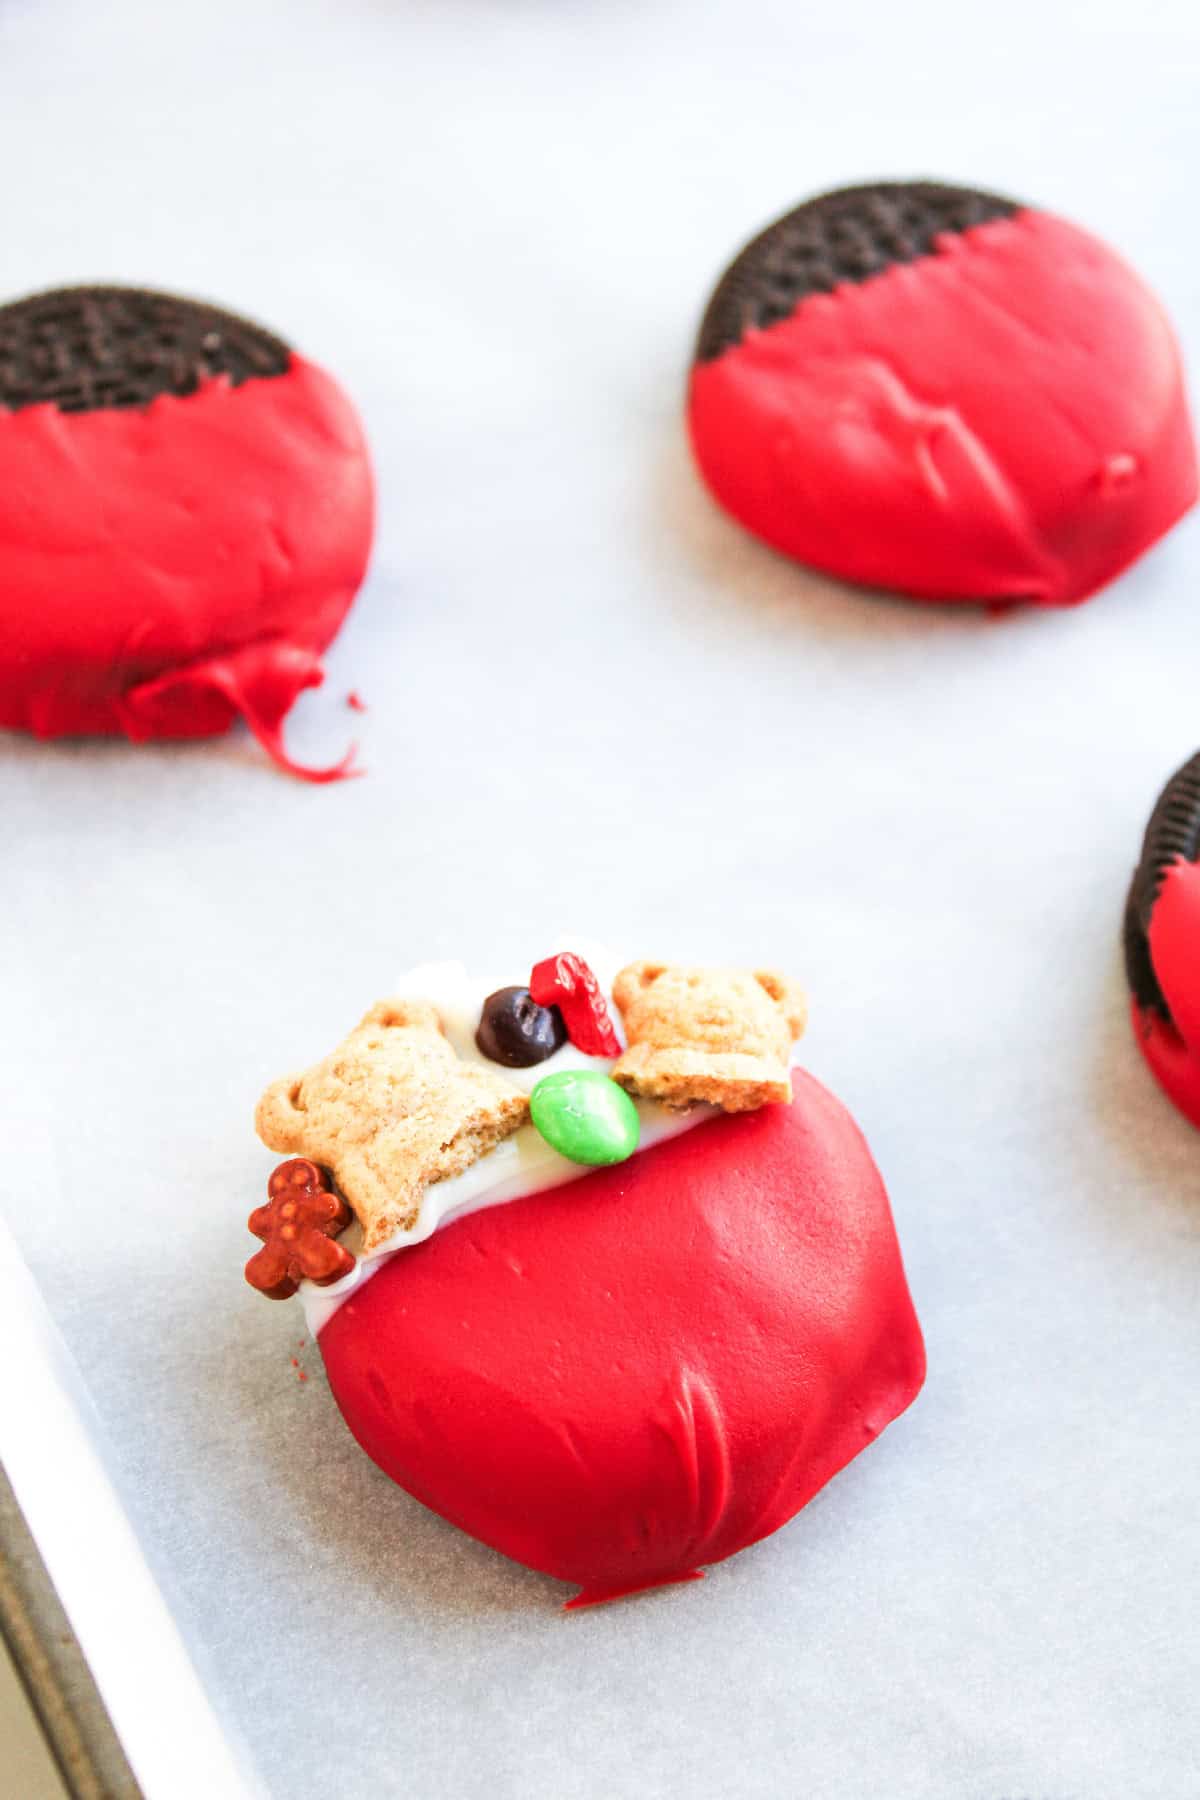
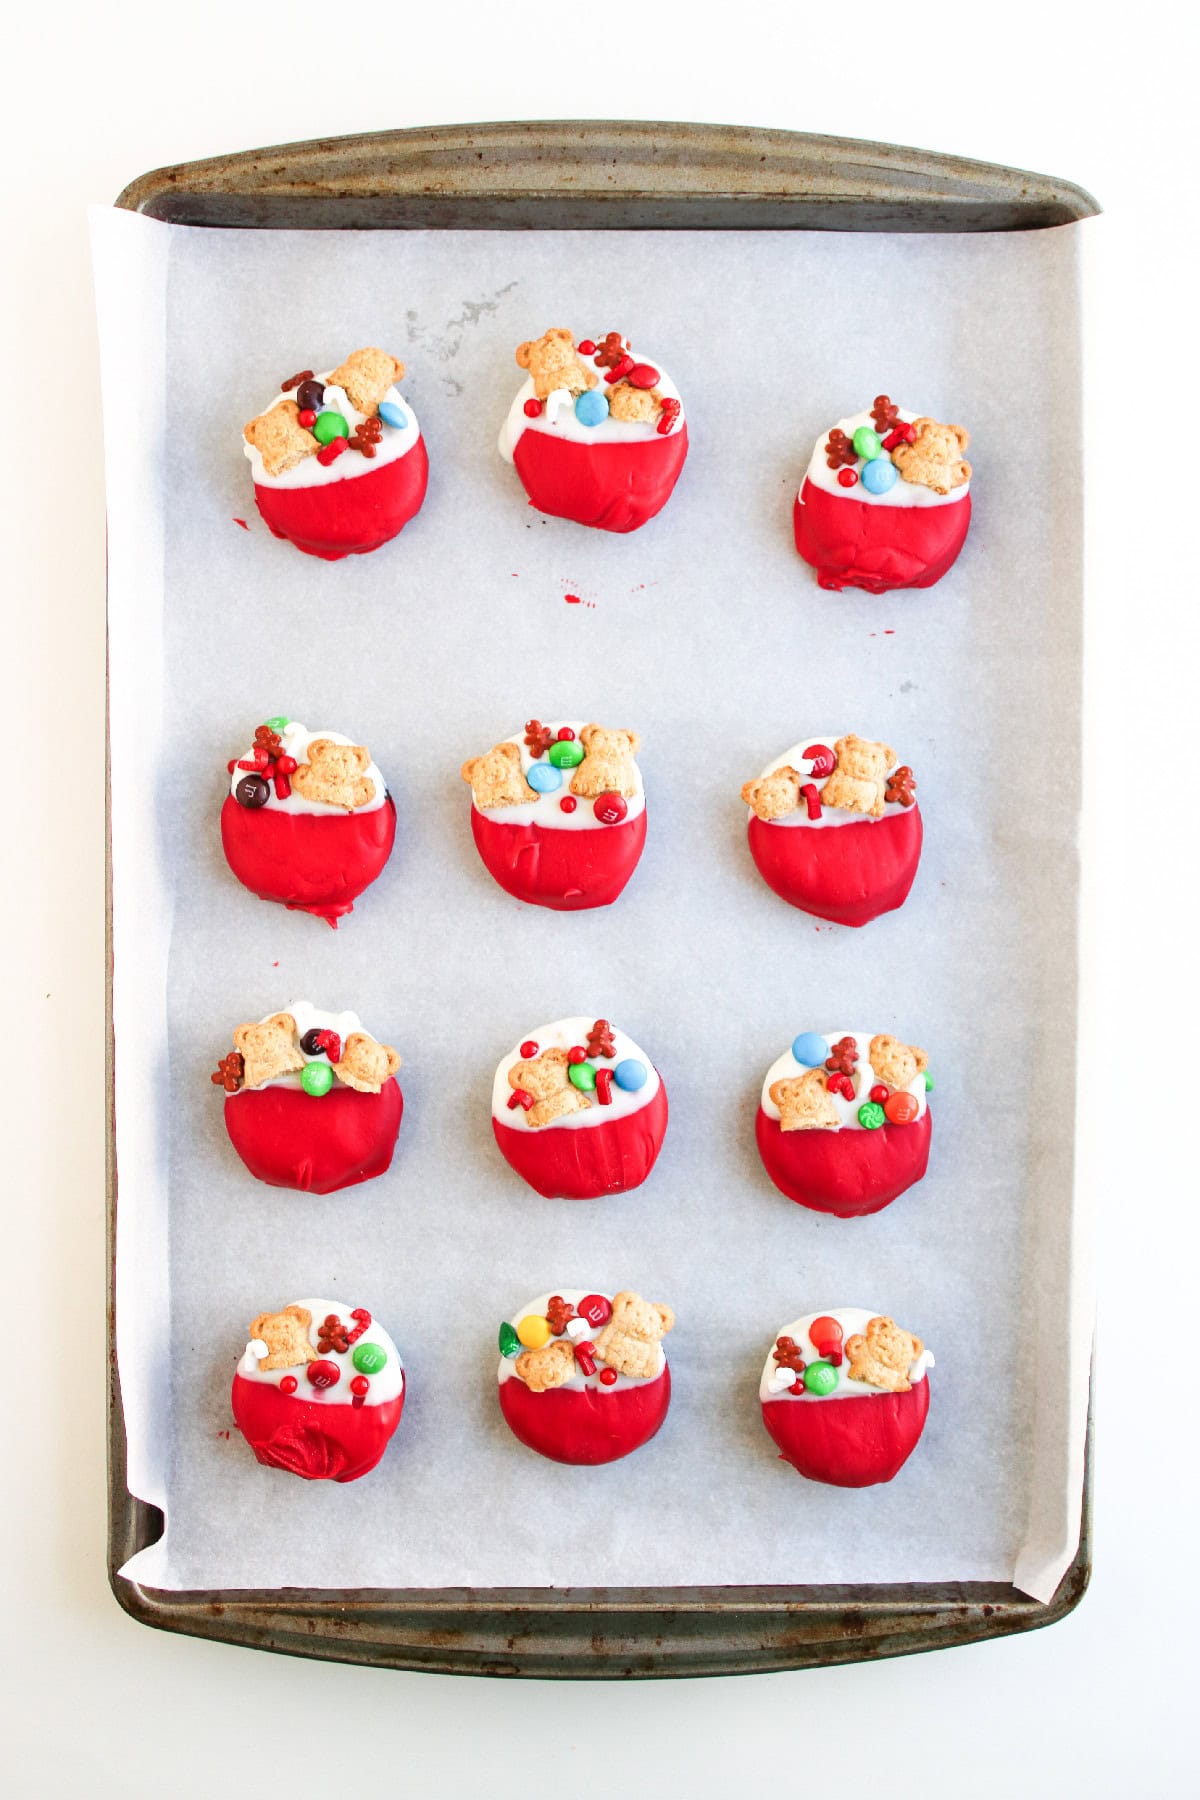
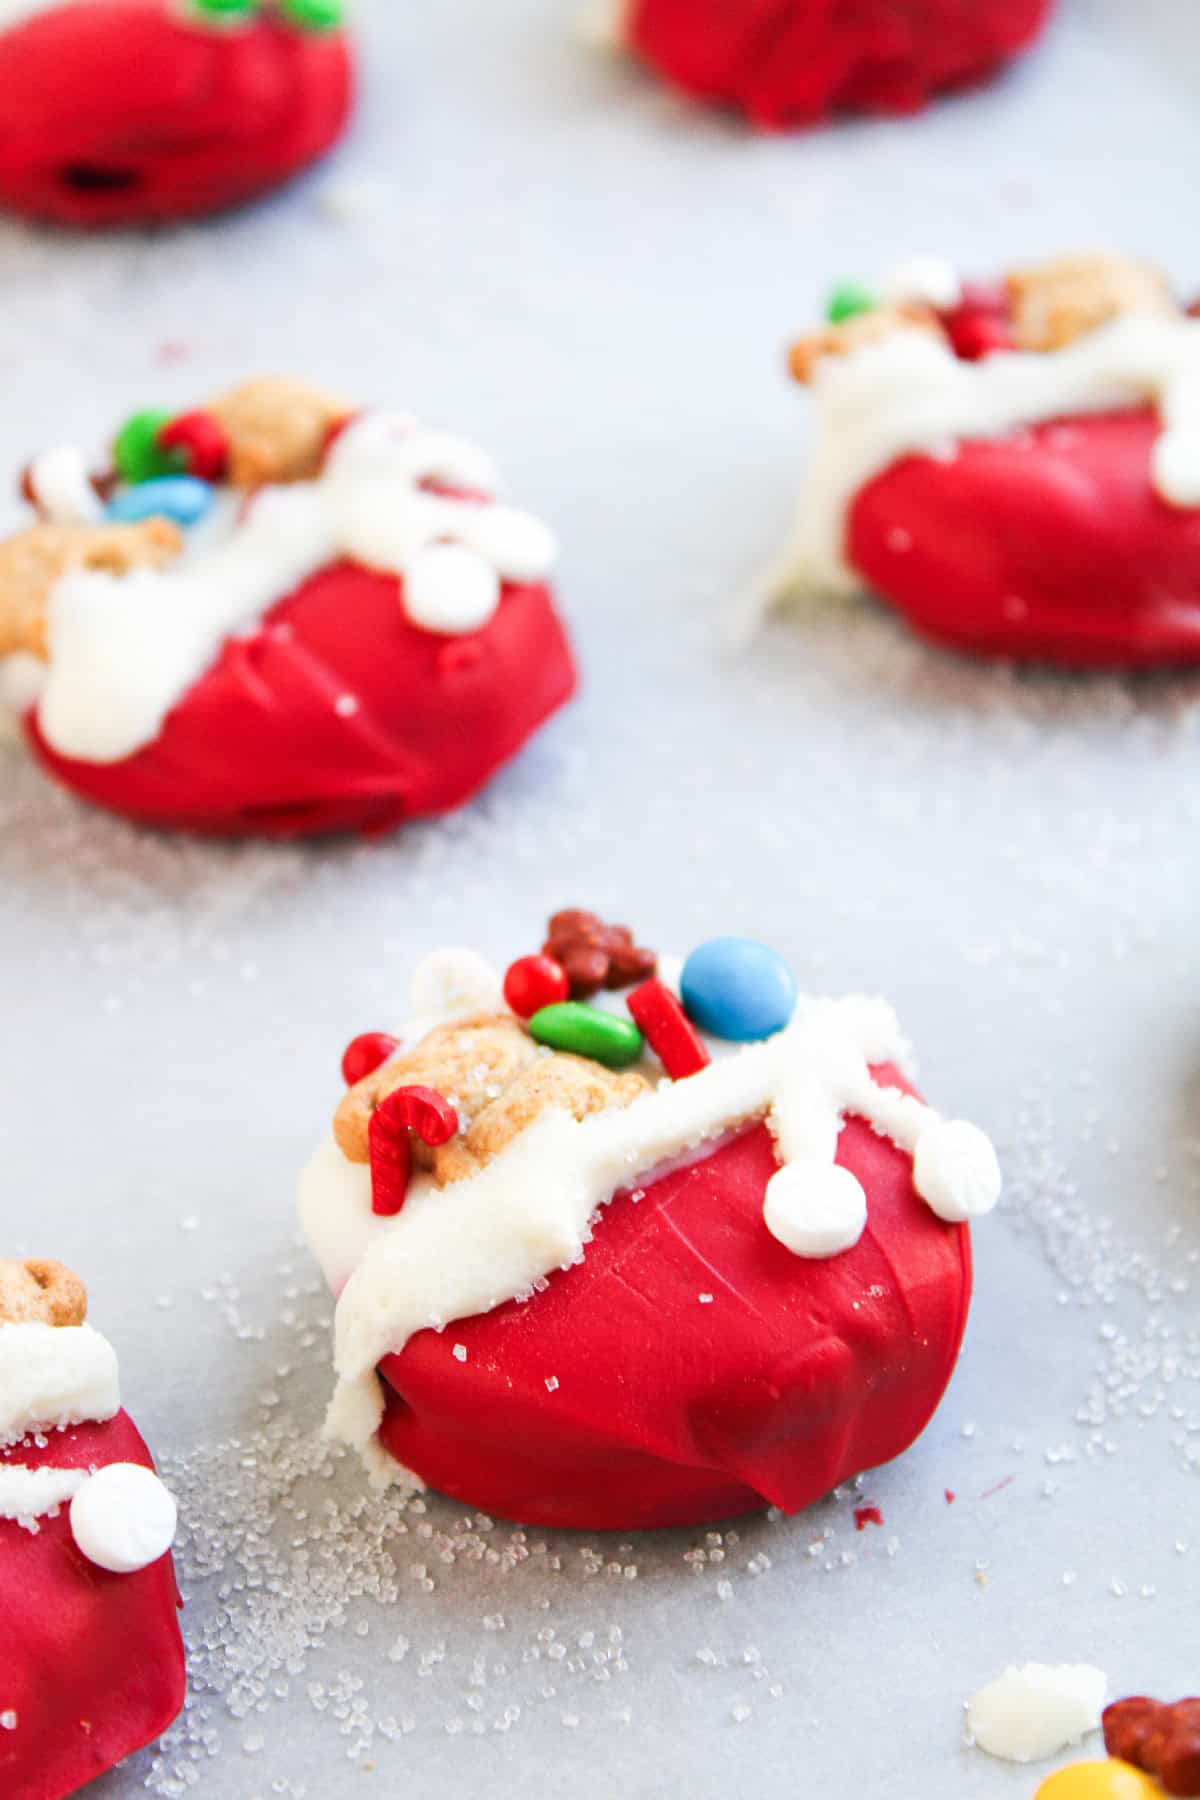
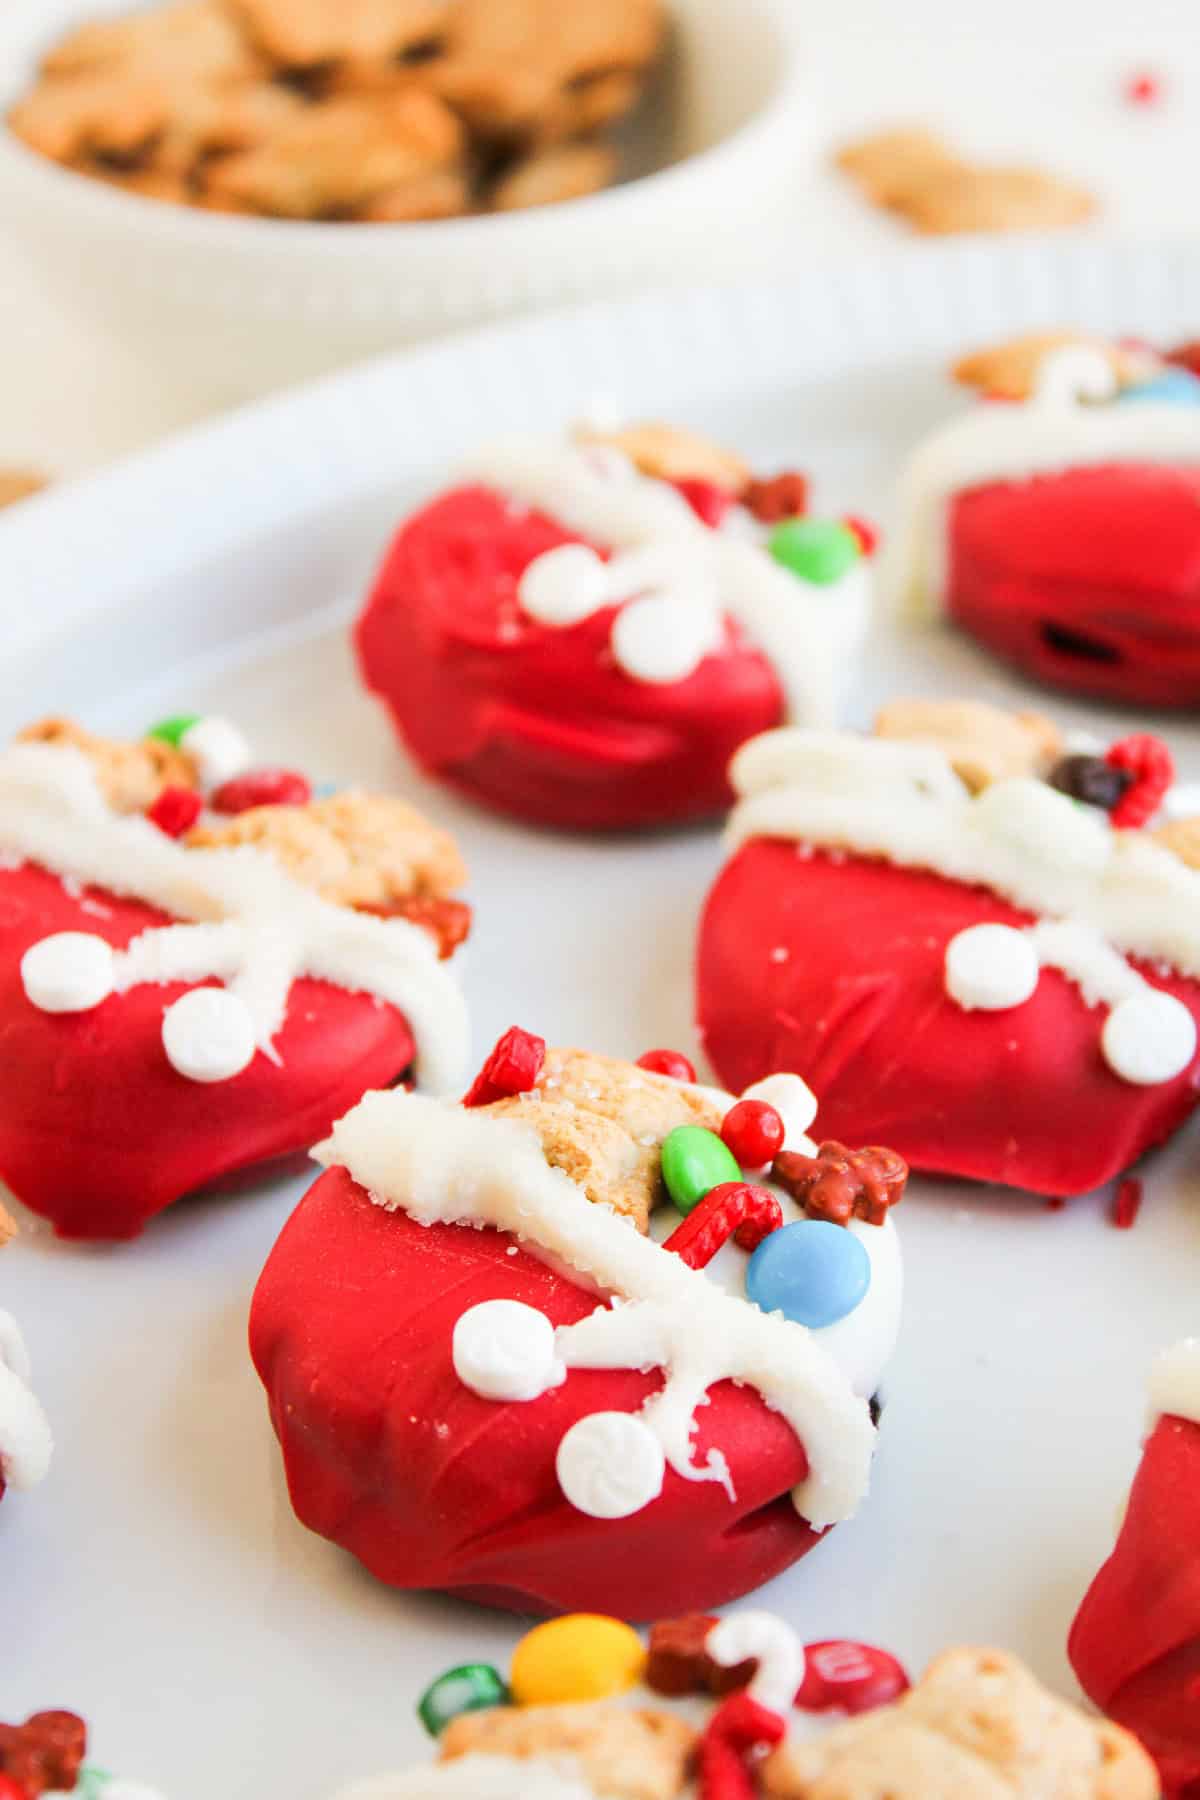
Decorate like Santa’s toy bag: Before the chocolate sets, gently press in mini M&M’s, Christmas sprinkles, and Teddy Grahams (breaking some to fit) to create the look of toys spilling out of Santa’s bag.
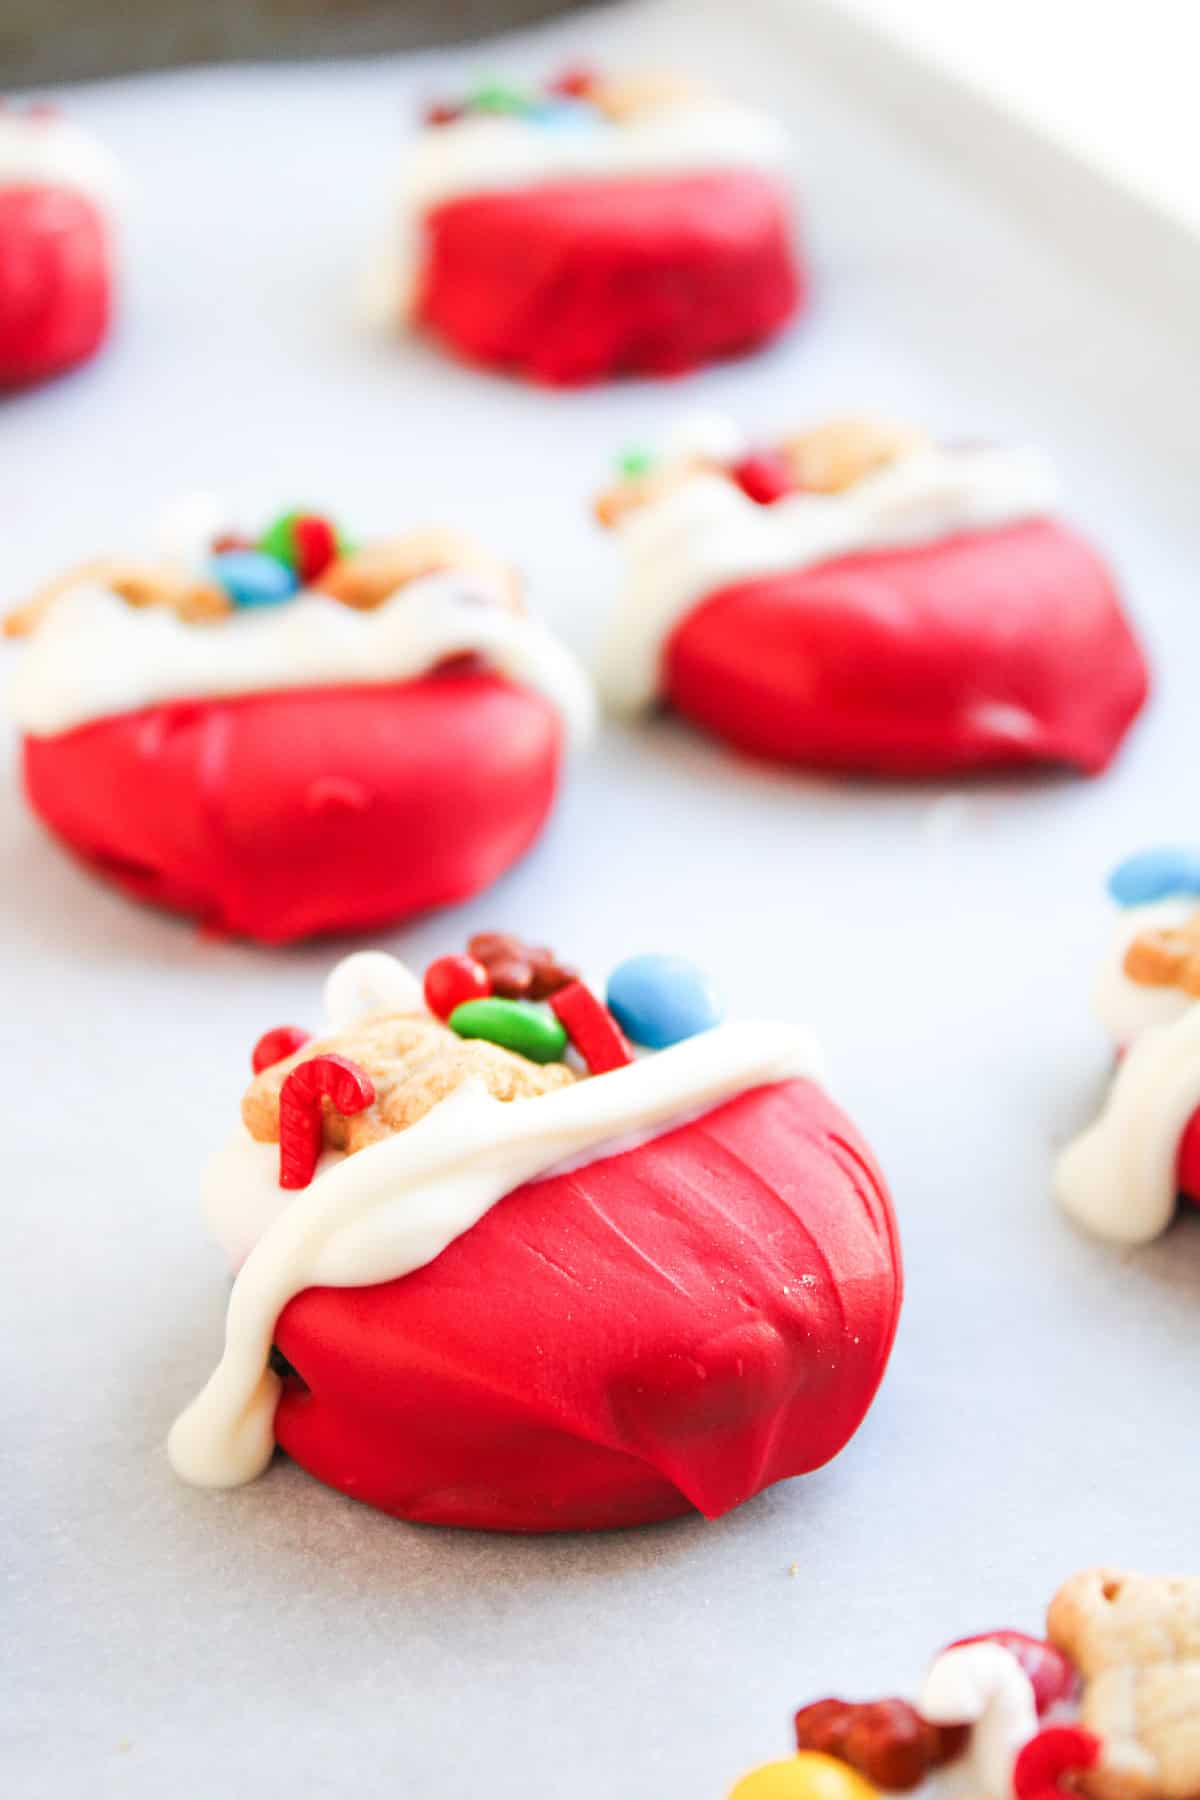
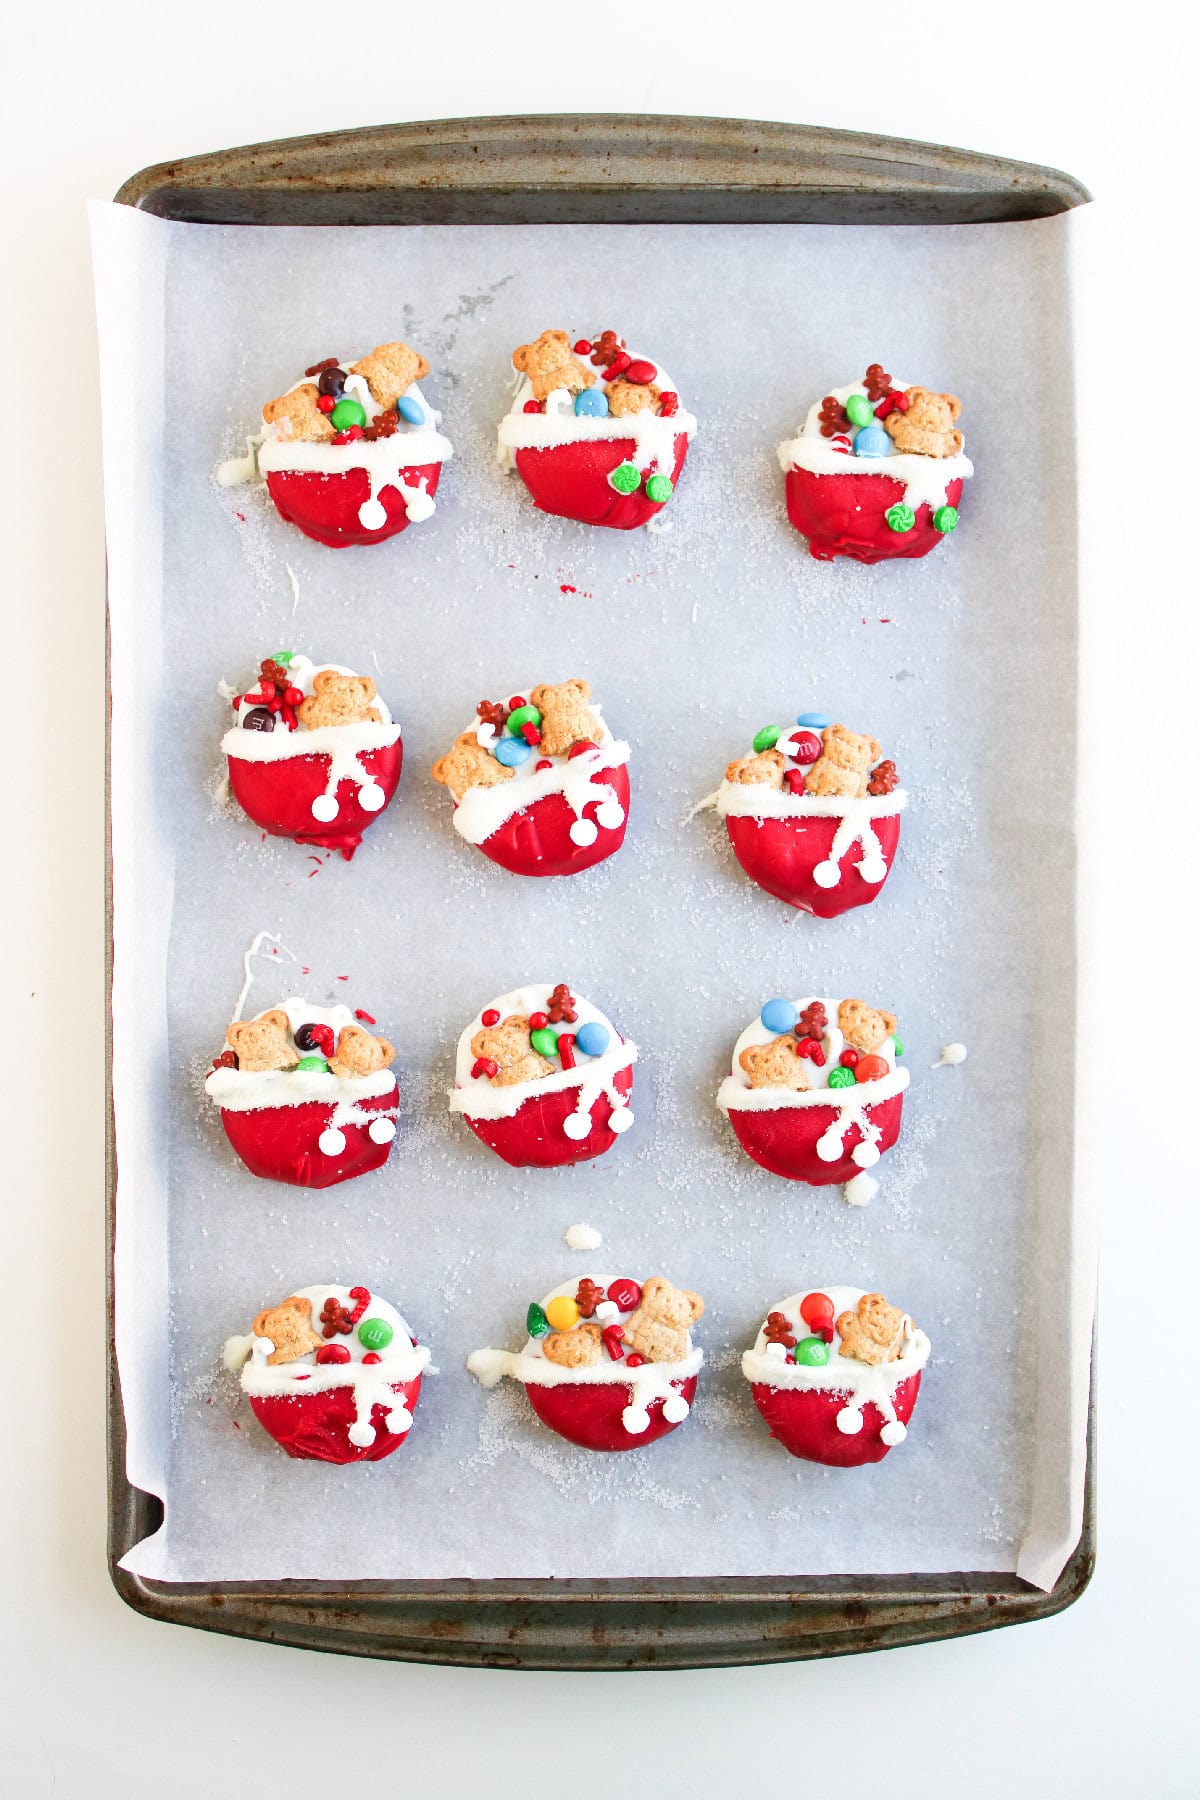
Add the finishing details: Drizzle a thin line of white chocolate where the red and white meet, then add two vertical lines to resemble bag strings.
Sprinkle on the sparkle: Dust the white section with white sanding sugar to give your Christmas chocolate Oreos a snowy, magical effect.
Let them set: Allow the Christmas Oreo cookies to harden completely before serving or packaging them up for holiday gifts.
Pro Tips for Perfect Christmas Oreos
Making the perfect chocolate dipped Christmas Oreos is all about working smart with your ingredients and adding those little touches that make them feel extra special.
For the smoothest coating, make sure your melted chocolate isn’t too thick. If it starts to cool and stiffen, warm it gently in the microwave for a few seconds and stir until silky smooth. Working in small batches keeps the chocolate at the right consistency, making it easier to coat each cookie evenly.

For an extra festive touch, melt a bit of green candy melts and dip a few cookies in green for a classic red, white, and green holiday look.
If you plan to give these treats as gifts, package your chocolate covered Oreos for Christmas in clear treat bags tied with a ribbon. It’s simple, beautiful, and helps keep the cookies fresh. Add a cute “Merry Christmas” tag to make it even more festive and personal.
Storing and Reheating Tips for Chocolate Covered Oreos
To keep your Christmas chocolate covered Oreos fresh and delicious, proper storage is key.
Store the cookies in an airtight container at room temperature. If your home is warm, pop the chocolate in the fridge to keep it from melting. Layer the cookies with parchment paper to prevent sticking. If stored properly, they’ll stay fresh and tasty for up to a week.
There’s no need to reheat these cookies; they’re best enjoyed at room temperature. If they’ve been in the fridge, let them sit out for about 10 minutes before serving so the chocolate softens just enough to bring out their best flavor and texture.

Fun Variations for Christmas Oreos
One of the best parts about making Oreo Christmas cookies is how easy it is to customize them to fit your holiday style.
Try using green candy melts instead of red, or mix and match both for a festive color combo. Swap out Teddy Grahams for mini candy canes or add edible glitter for extra sparkle. You can also use different sprinkles, crushed peppermint, or gold edible pearls to make each chocolate covered Christmas Oreo one of a kind.
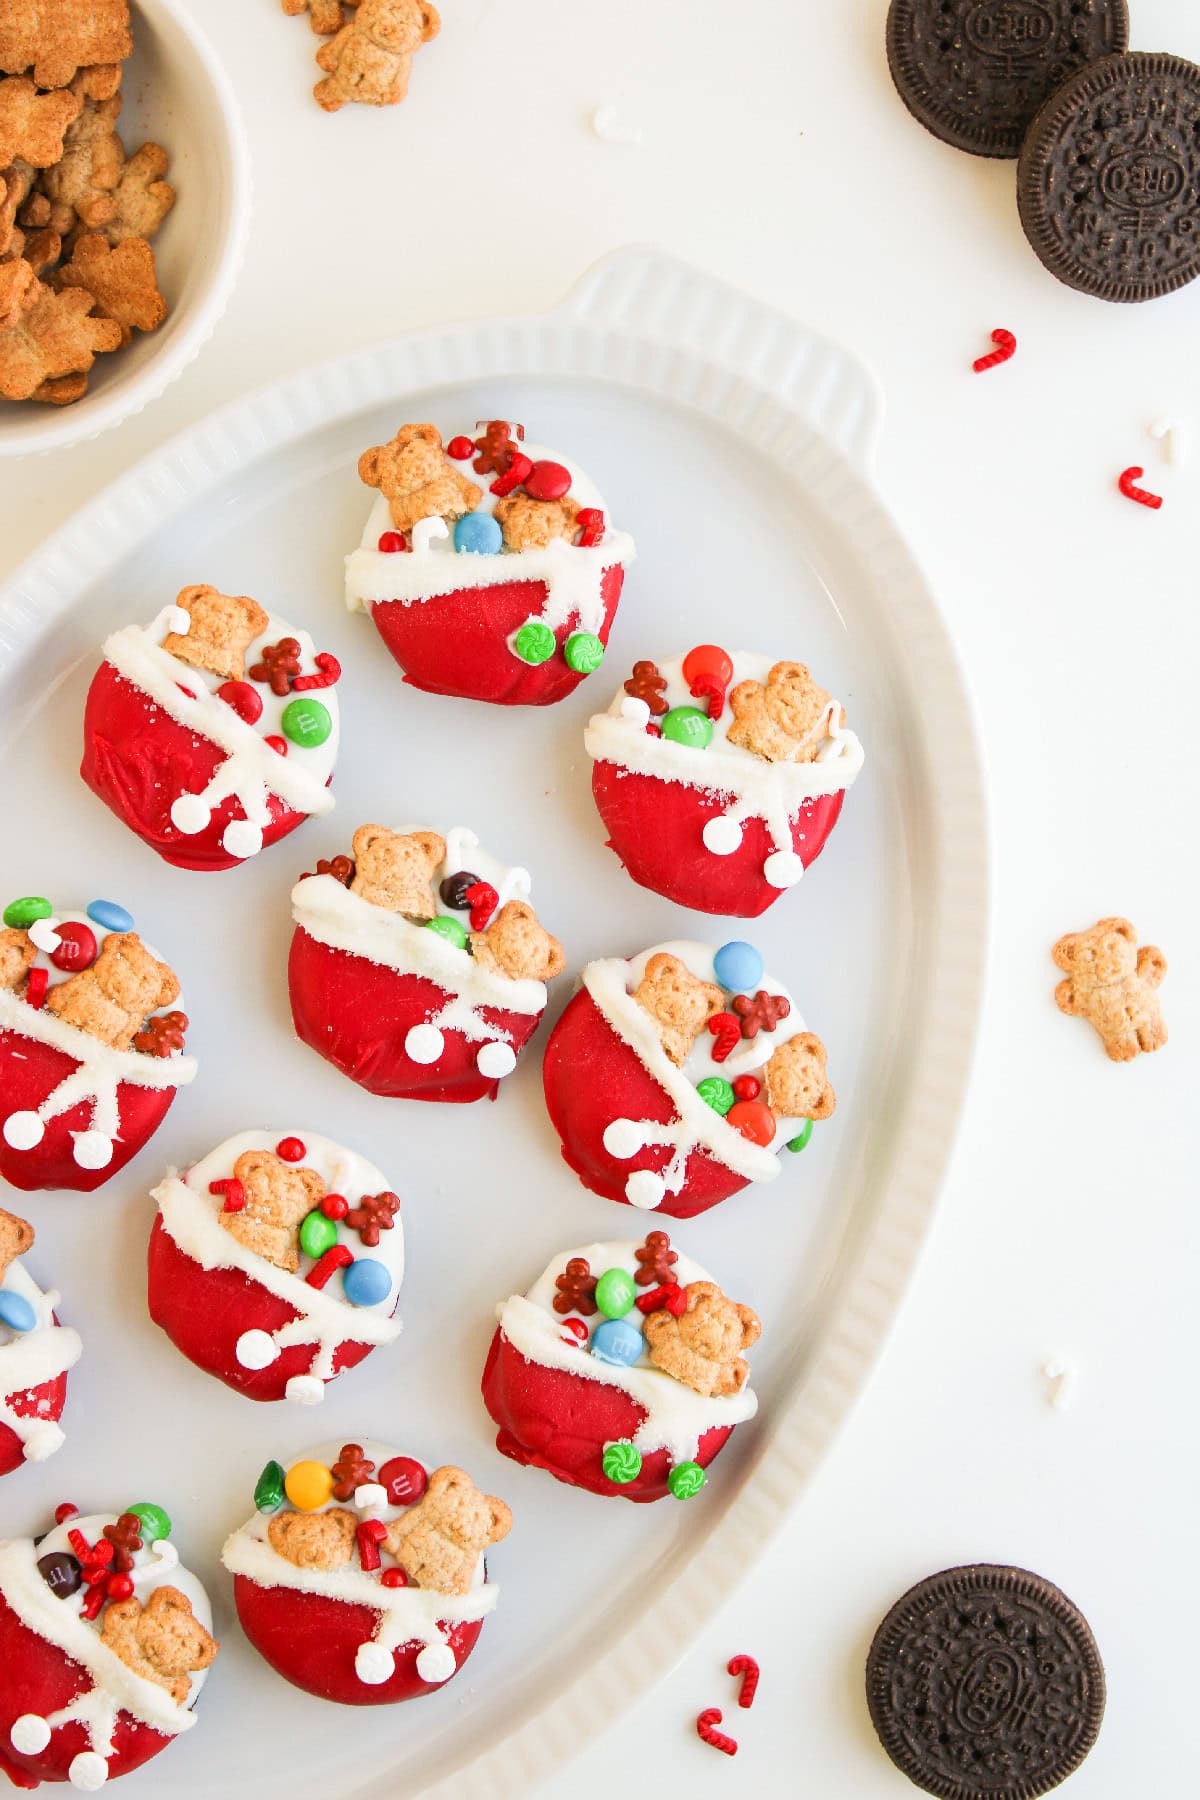
These simple tweaks let you create a whole platter of unique and beautiful cookies that are perfect for parties, dessert tables, or gift boxes.
Perfect Pairing Dishes for Christmas Oreos
These Christmas Oreos pair perfectly with cozy holiday drinks like hot cocoa, peppermint coffee, or creamy eggnog. They’re also a great match for sugar cookies, gingerbread men, or chocolate-dipped pretzels on a festive dessert board.
For parties or gift boxes, these chocolate covered Oreos for Christmas add a sweet, cheerful touch to any holiday spread.
Final Thoughts
Making Christmas chocolate covered Oreos is a fun and easy way to bring extra holiday cheer to your dessert table. With simple ingredients like candy melts, sprinkles, and your favorite toppings, you can turn ordinary cookies into something magical and memorable.
Whether you’re gifting them, serving them at a party, or enjoying them with family, these festive cookies are guaranteed to bring smiles. Plus, they store well, so you can make them ahead and keep the holiday stress-free and sweet.
This is one of the easiest Christmas cookie recipes with Oreos, and it’s a guaranteed hit for both kids and adults!
FAQ
Yes, you can! Regular chocolate works fine for making Christmas Oreos, but melting wafers are easier to work with because they melt smoothly and set quickly. If using regular chocolate, add a touch of coconut oil to help it stay glossy and smooth when coating your Oreo cookies.
The key is to let your chocolate dipped Christmas Oreos set at room temperature before chilling them. If they go straight from hot melted chocolate to a cold fridge, the shell can crack. A gentle set time ensures a smooth, even finish.
Definitely! Green candy melts are a great way to add a festive Christmas tree feel to your cookies. You can also mix and match colors to create different designs for your Christmas chocolate covered Oreos.
These chocolate covered Oreos can be made up to a week ahead. Store them in an airtight container at room temperature, layered between parchment paper to keep them from sticking together. They’ll stay fresh, crisp, and delicious throughout the holidays.
Not always. If your home is cool, you can keep them at room temperature. If it’s warm or humid, it’s best to refrigerate them to keep the chocolate dipped Oreos from melting. Let them sit out for a few minutes before serving so the coating softens slightly.
Yes, but it’s best to freeze the Oreo cookies before decorating. Freezing fully decorated cookies can cause condensation on the chocolate, which can affect their appearance. If you do freeze them, wrap them tightly and thaw in the fridge before serving.
Microwaving in short intervals works great. Heat your candy melts or chocolate in 20–30 second bursts, stirring each time until smooth. You can also use a double boiler for more controlled melting. Either method gives you silky, melted chocolate perfect for dipping.
There are so many options! Try drizzling contrasting colors of melted chocolate, adding crushed candy canes, or topping them with gingerbread man sprinkles. A touch of white sanding sugar gives a snowy effect, while M&M’s or small candies make them look like ornaments.
Make sure your melted chocolate is smooth and not too hot. Gently lower each Oreo cookie into the chocolate with a fork, then lift it out carefully, tapping off the excess. This helps prevent breakage and gives each dipped cookie a clean finish.
Absolutely! These Santa’s Toy Bag Oreos make wonderful edible gifts. Wrap your chocolate covered Oreos for Christmas in clear treat bags with a festive ribbon, or place them in small holiday boxes with parchment paper. They’re affordable, adorable, and perfect for spreading a little Christmas joy.

Easy Christmas Oreos: Santa’s Toy Bag Oreos Recipe
Ingredients
- 12-16 Oreo cookies
- 10 oz red melting chocolate wafers
- 10 oz white melting chocolate wafers
- ½ cup Teddy Grahams
- 1 tbsp Mini M&M’s
- 1 tbsp assorted Christmas sprinkles such as candy canes, gingerbread men, or your favorites
- 1 tbsp white sanding sugar
Instructions
- Prepare your workspace: Line a baking sheet with parchment paper so your cookies have a clean surface to set on.
- Melt the red chocolate: In a microwave-safe bowl, melt the red melting wafers in 30-second intervals, stirring between each, until smooth and glossy.
- Dip the cookies: Dip each Oreo about three-quarters of the way into the red melted chocolate, then place it on the prepared baking sheet to harden completely.
- Add the white chocolate layer: Using the same melting method, prepare the white chocolate. Dip the opposite side of each cookie into the white chocolate, letting it meet the red for a clean line.
- Decorate like Santa’s toy bag: Before the chocolate sets, gently press in mini M&M’s, Christmas sprinkles, and Teddy Grahams (breaking some to fit) to create the look of toys spilling out of Santa’s bag.
- Add the finishing details: Drizzle a thin line of white chocolate where the red and white meet, then add two vertical lines to resemble bag strings.
- Sprinkle on the sparkle: Dust the white section with white sanding sugar to give your Christmas chocolate Oreos a snowy, magical effect.
- Let them set: Allow the cookies to harden completely before serving or packaging them up for holiday gifts.